• How to Close an Escalation

    In this article, we’ll guide you through the different ways of closing an escalation.

    1 min task

    What 

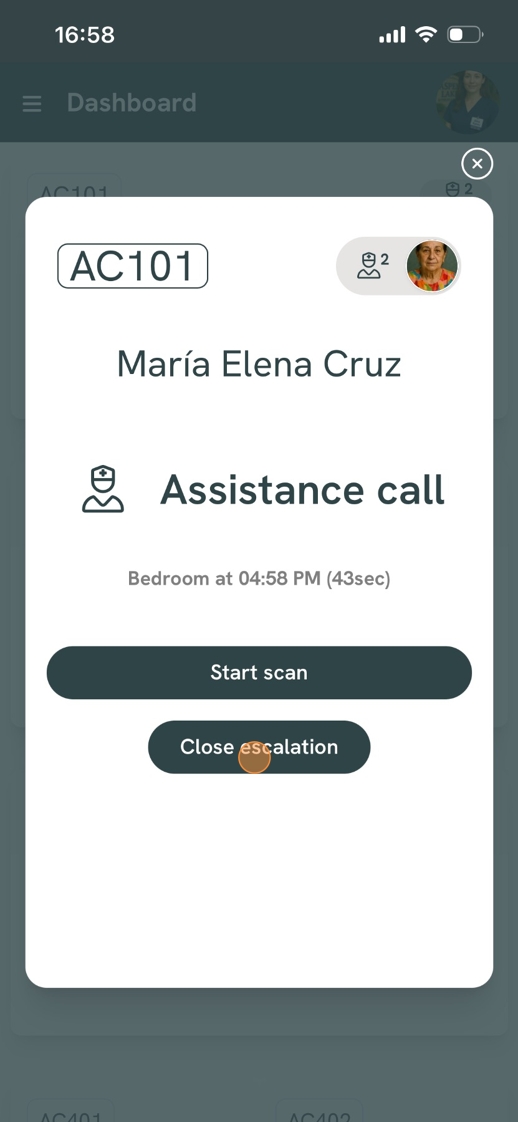
    When there’s an open escalation due to a resident in need, it’s important to close it once assistance has been provided. This can be done in three different ways: using a nurse call system integrated with Nobi, by pressing the snooze button, or by closing it in the application. Depending on how you choose to close an escalation, different options will be available.

    Why

    Closing an escalation promptly after a resident has been helped offers two major benefits: Nobi will stop alerting staff members of the escalation, and Nobi will be able to create a new escalation for this housing unit the next time a fall occurs. While the first advantage mainly reduces staff burden, the second is crucial for the resident's safety.


    Ways of closing an escalation 

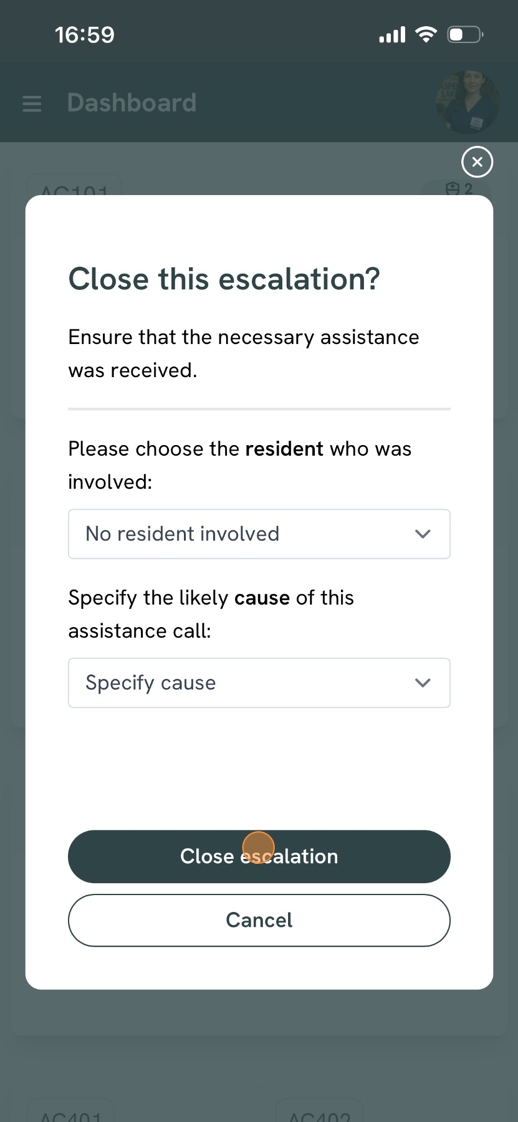
    Selecting the most effective method for closing an escalation is key. You might prefer using the snooze button due to its simplicity. However, if there's an existing nurse call system integrated, closing escalations through it might be more convenient  , as staff are already familiar with this system. Another option is to close the escalation in the app. The advantage of this method is that it allows you to track who closed the escalation and lets you add the cause of the escalation and assign a resident to the escalation while closing it.

    Under certain conditions, escalations can also auto-close. If, after five minutes, no one is detected on the floor, Nobi will automatically close the escalation. This reduces unnecessary follow-up when a resident has already been helped. You can learn more about this here.

    Depending on the way you choose to close the escalations, you have varying advantages and drawbacks. Below the different options:

    Way of closing Ease of use Automatically snooze after closing? See who closed the escalation? Instantly add cause of escalation?
    Snooze button Easy 15 minutes No No
    Application Medium No Yes Yes
    Nurse call system Easy No depends on system depends on system


    Detailed steps

    1. Closing with the snooze button

    Upon entering the room of the resident in need, press the snooze button to close the escalation. The housing unit will automatically be snoozed for 15 minutes. This gives you the time to help the resident without Nobi creating a new escalation.

    2. Closing in the application 

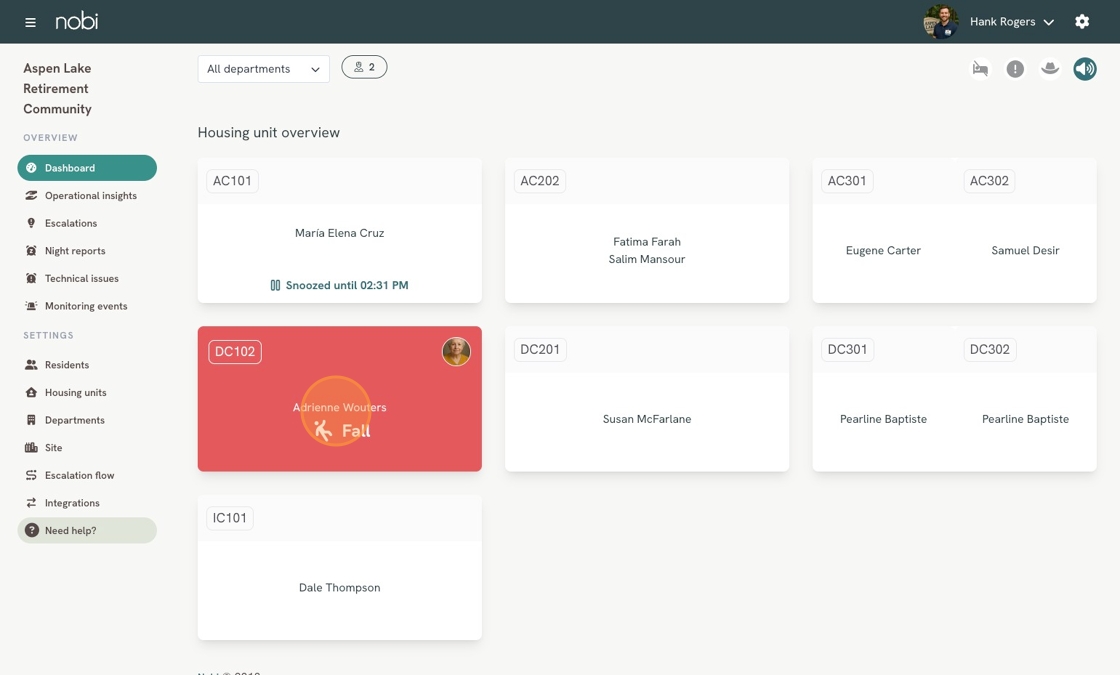
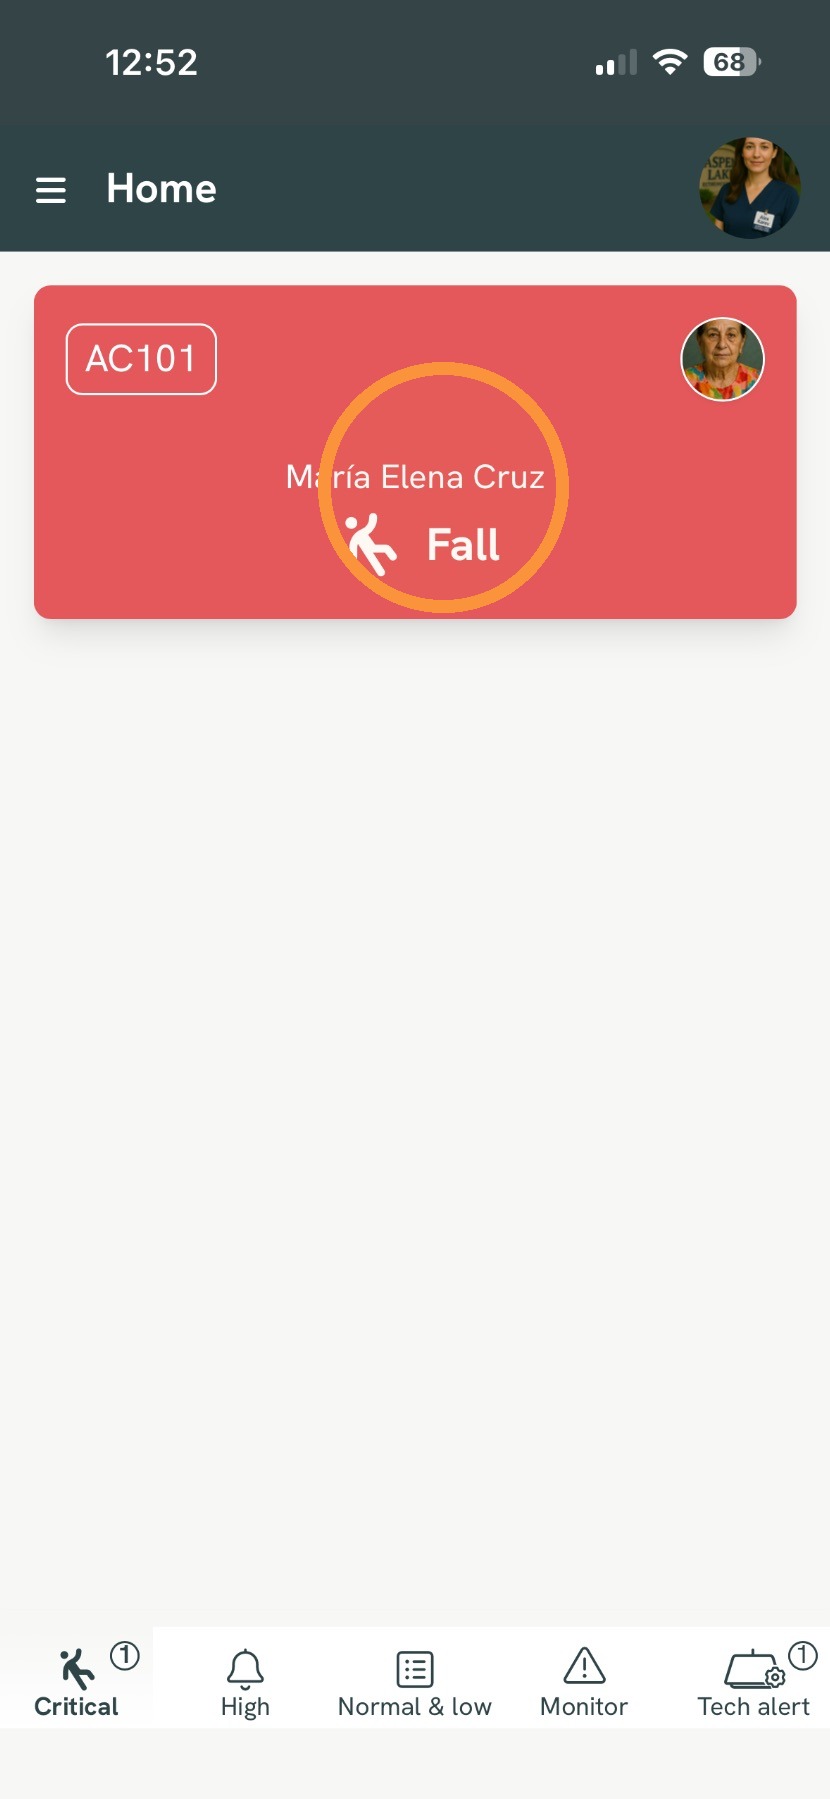
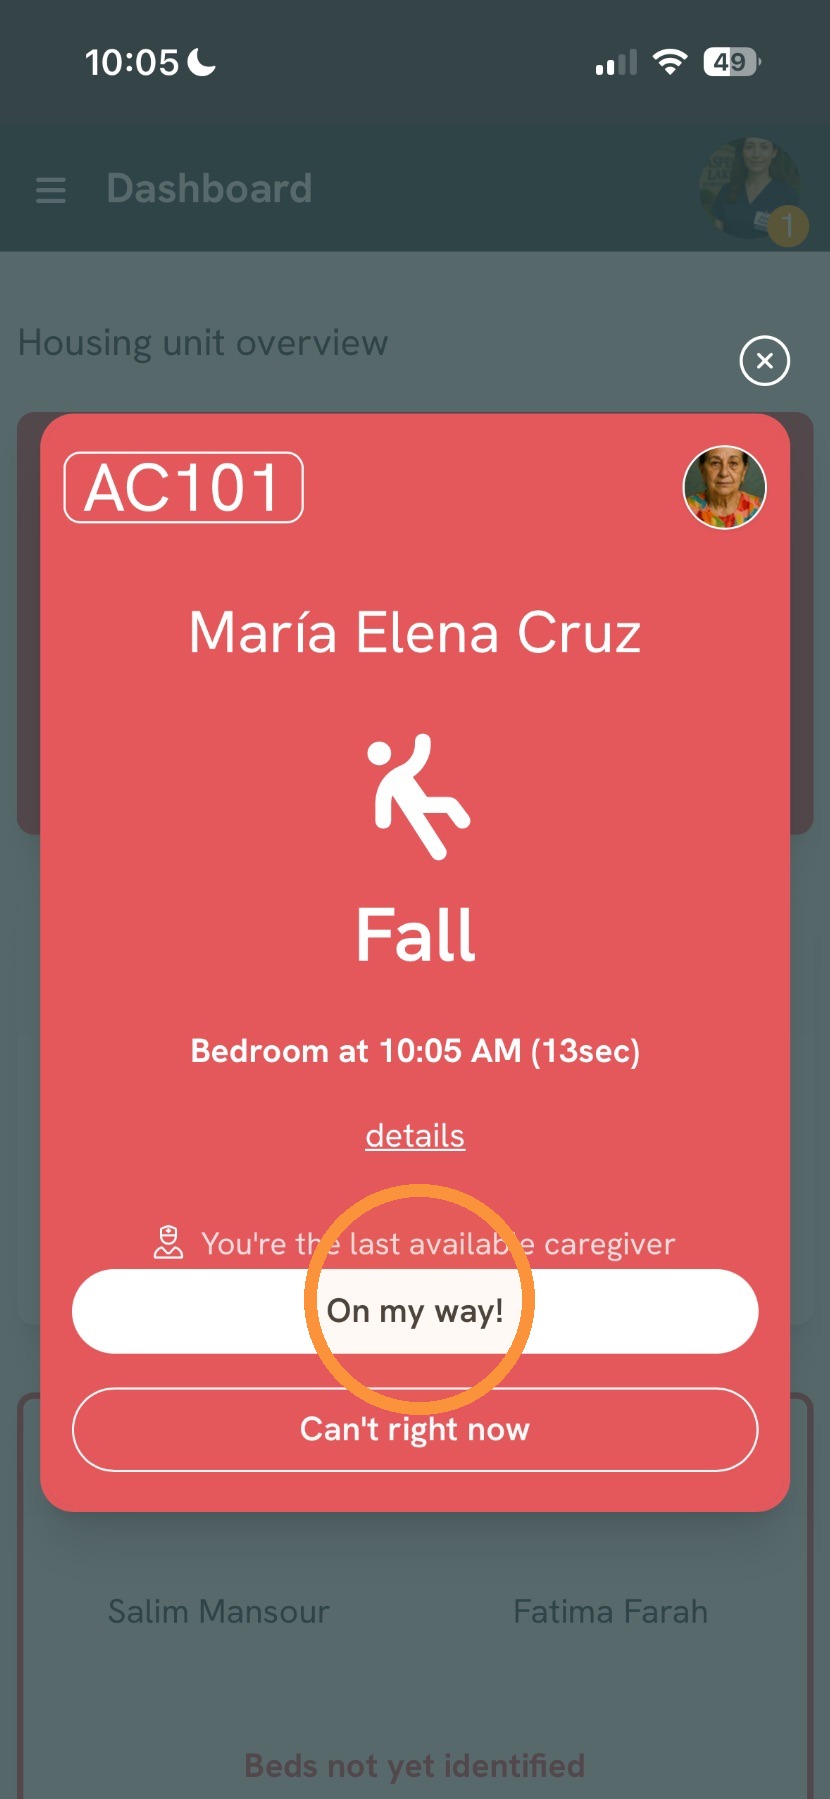
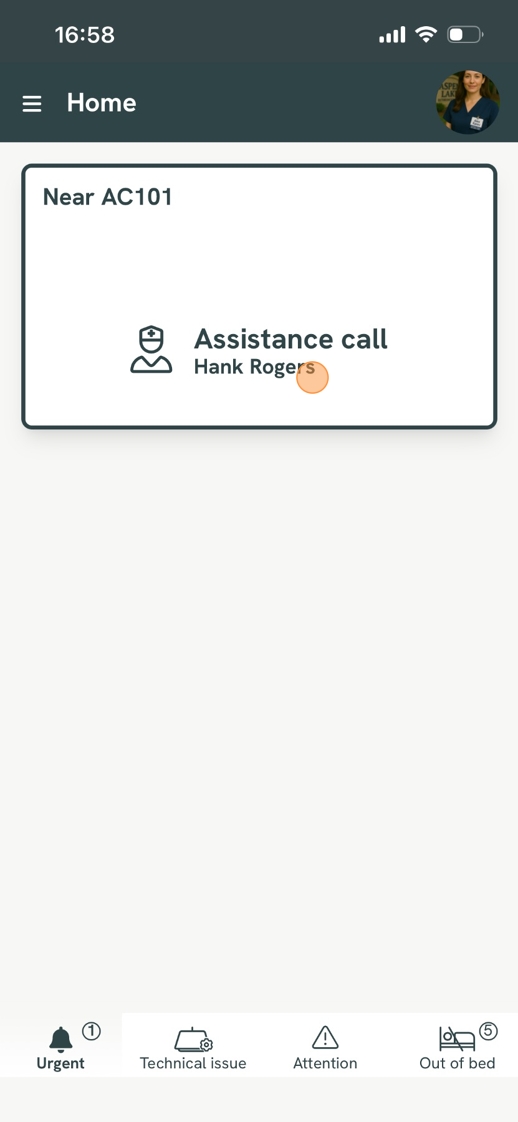
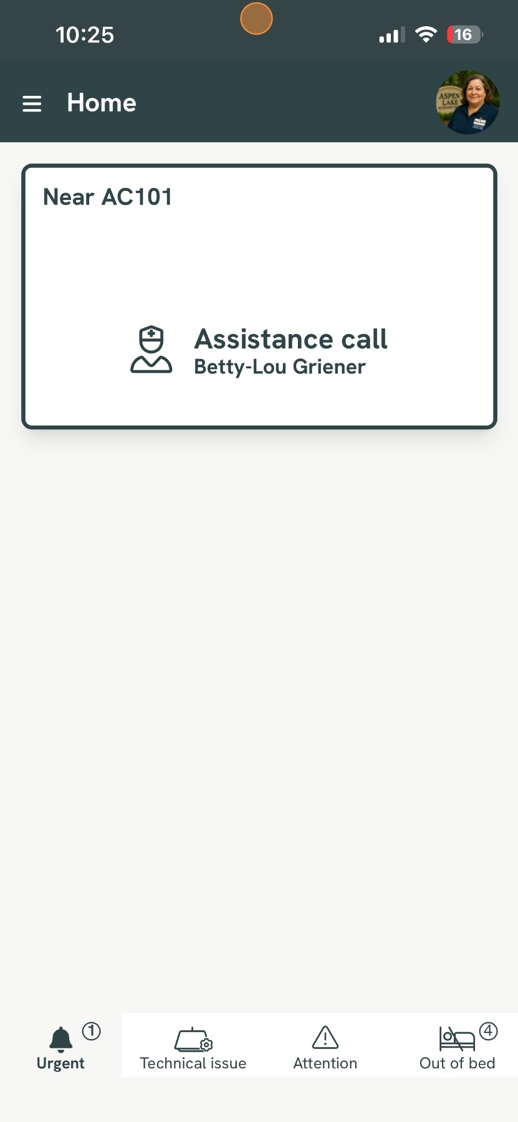
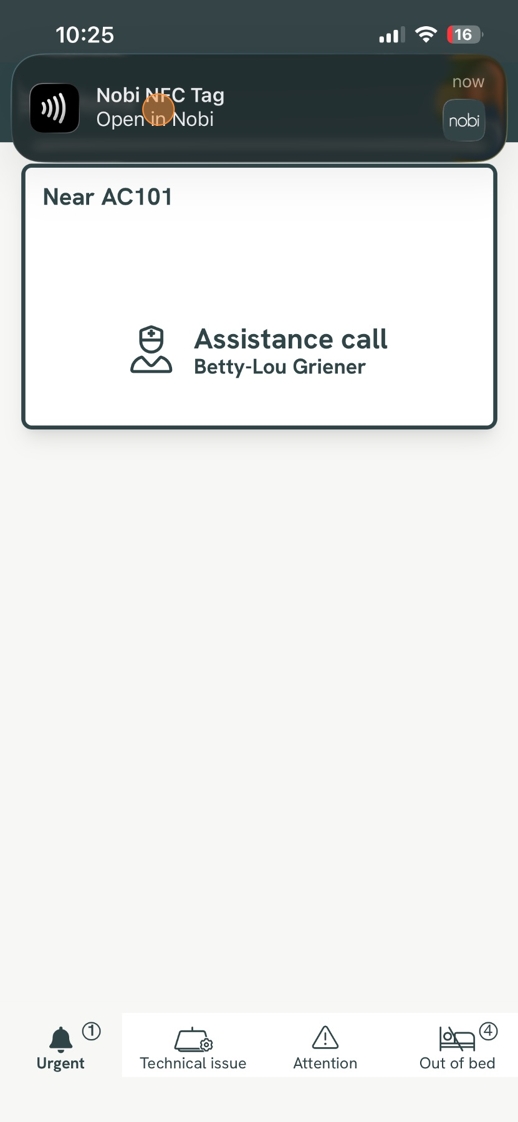
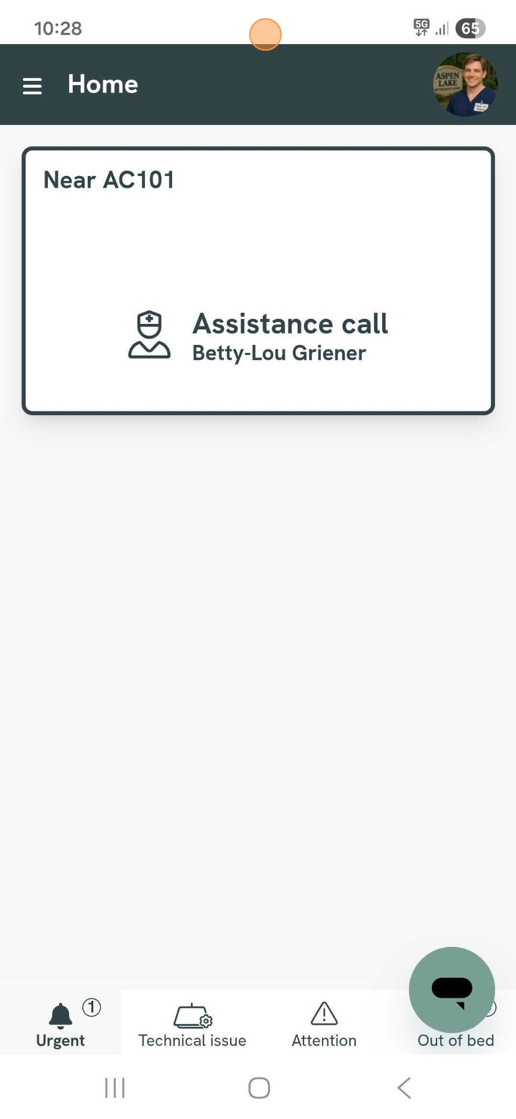
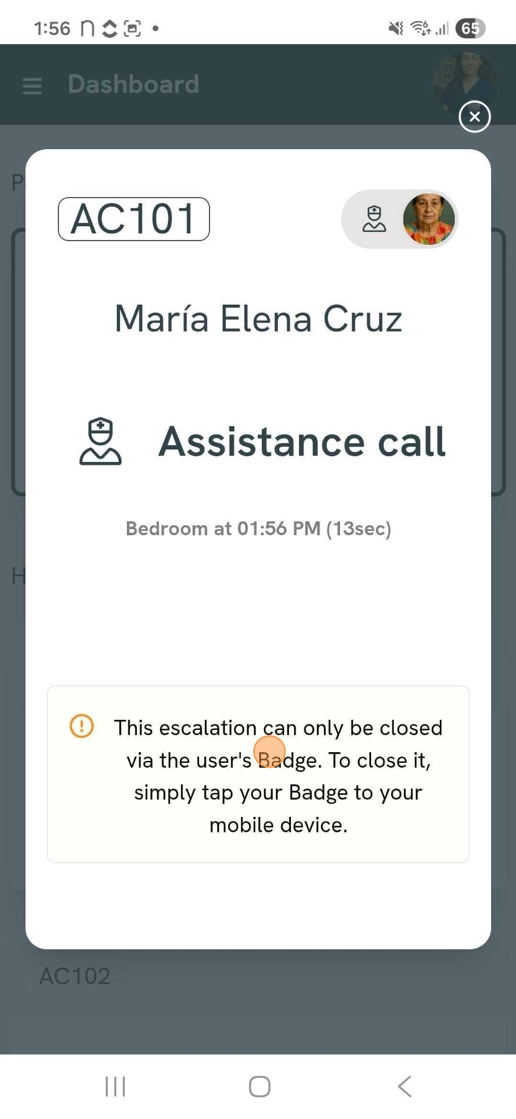
    1. On the dashboard, click on the red resident card. Please note, if you’re using the mobile app, you can directly go to the escalation via the ‘home’ menu.
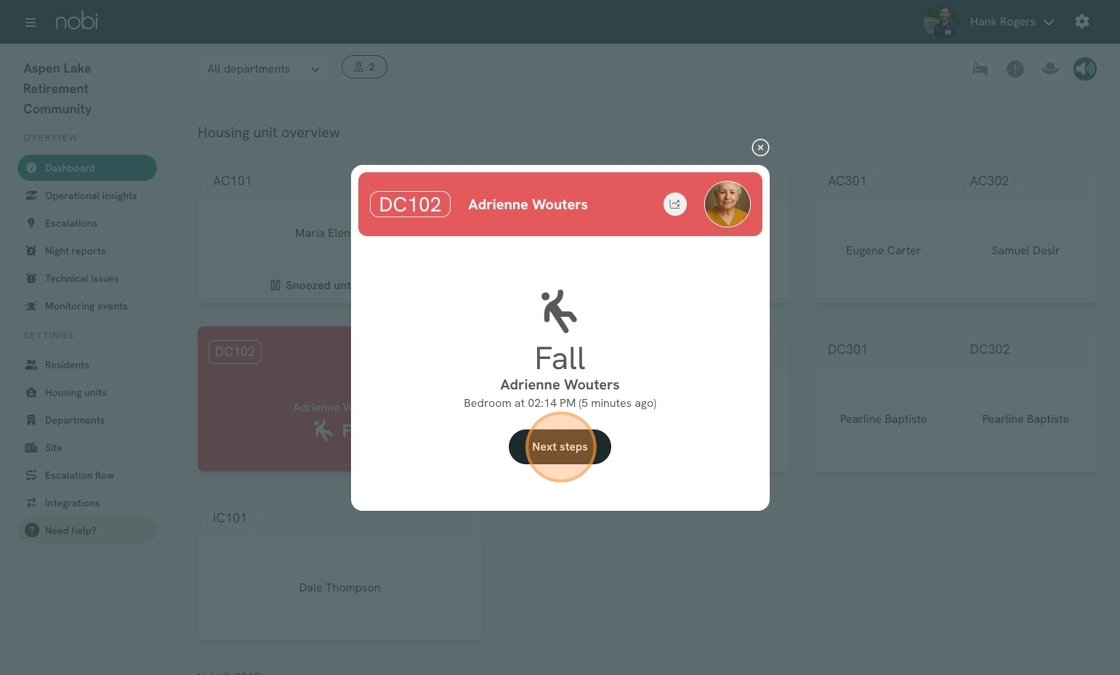
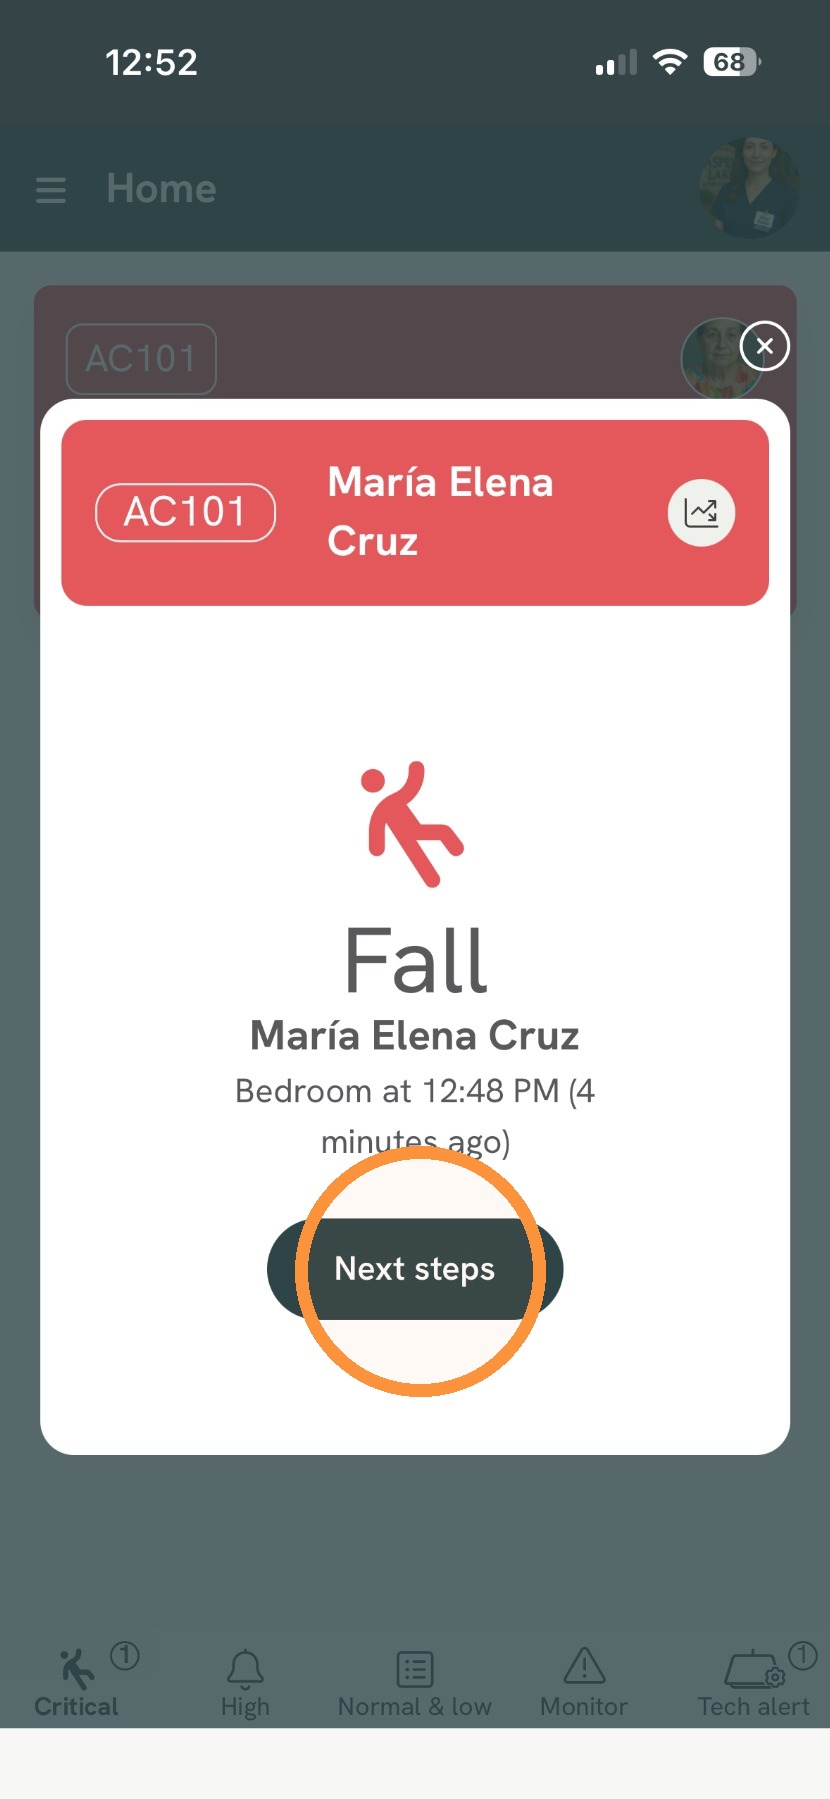
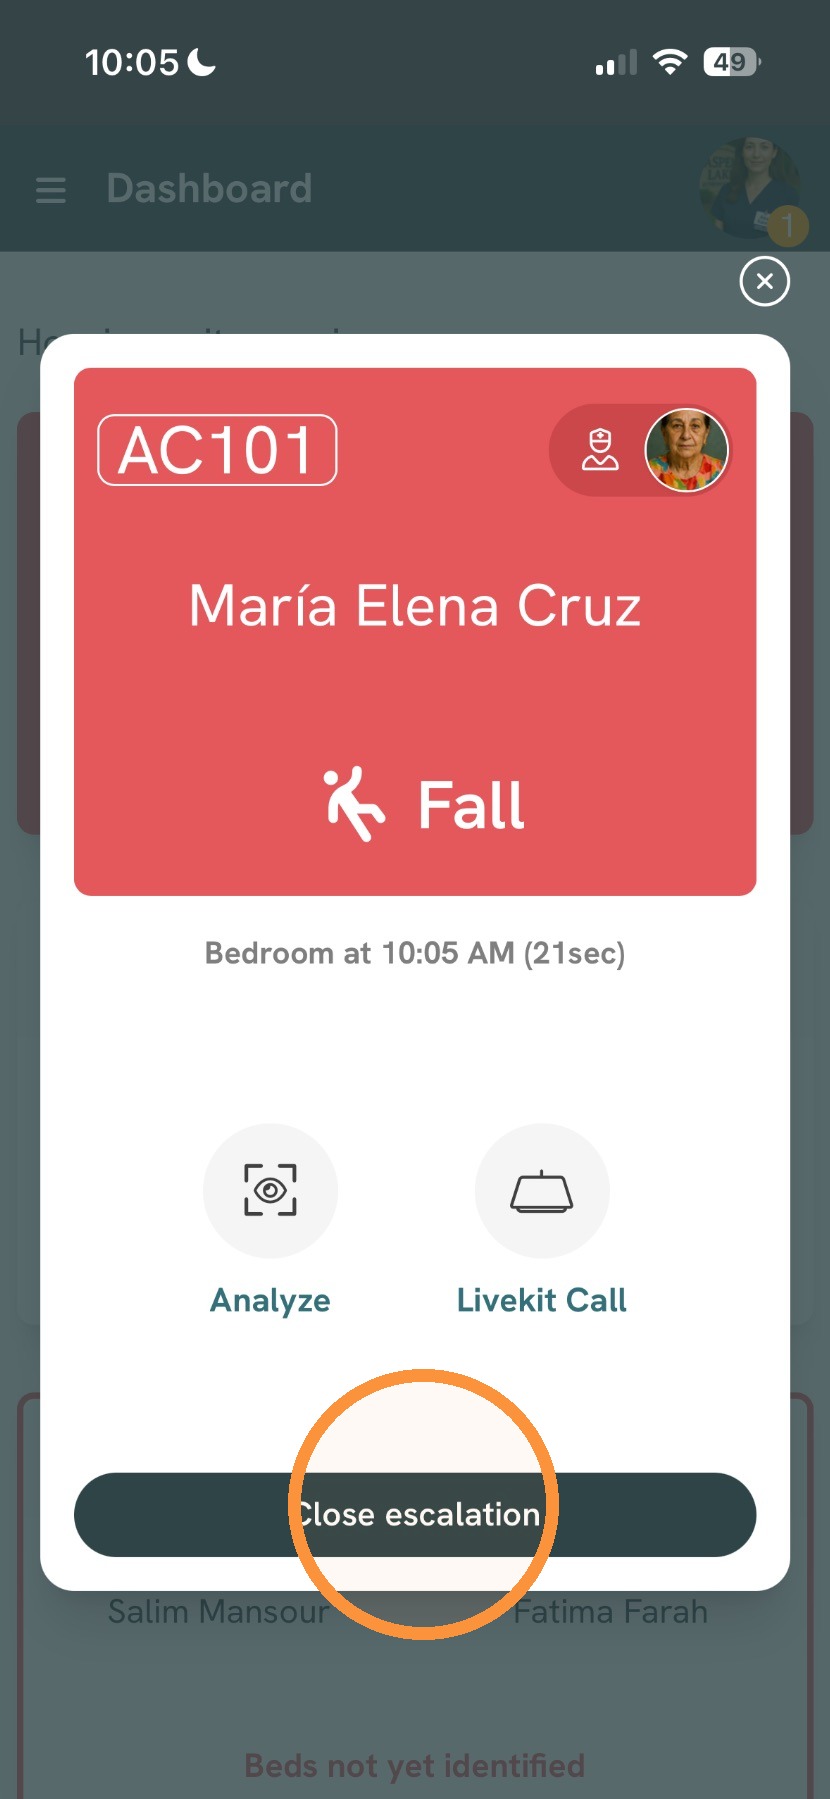
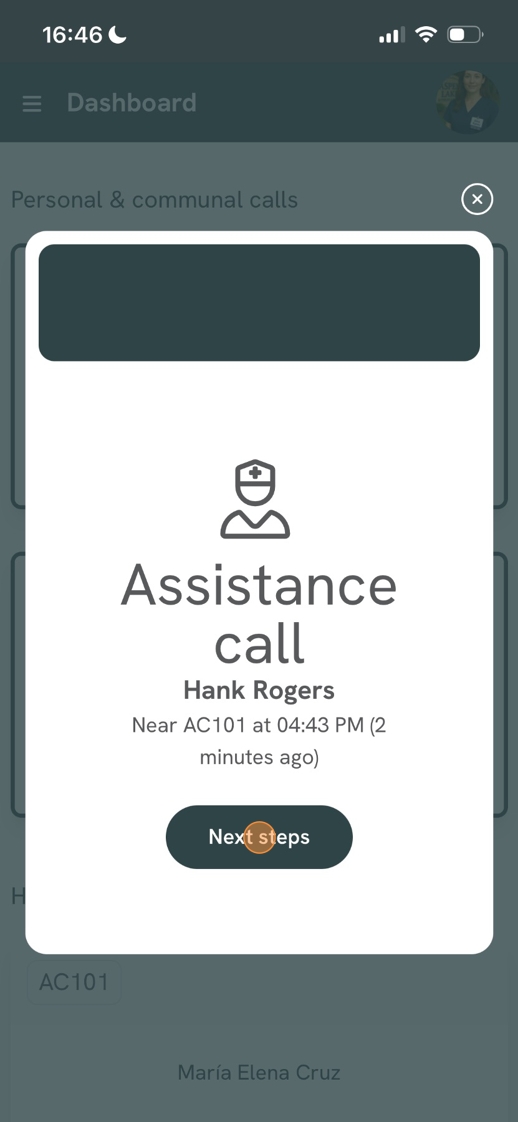
    2. Click on Next steps.
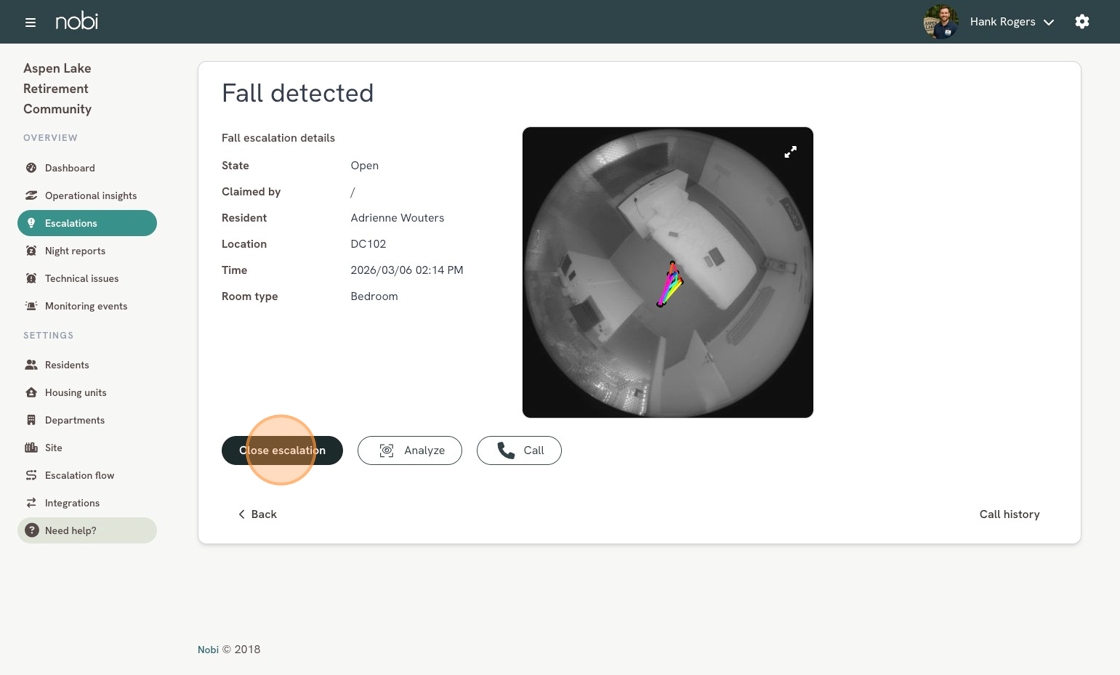
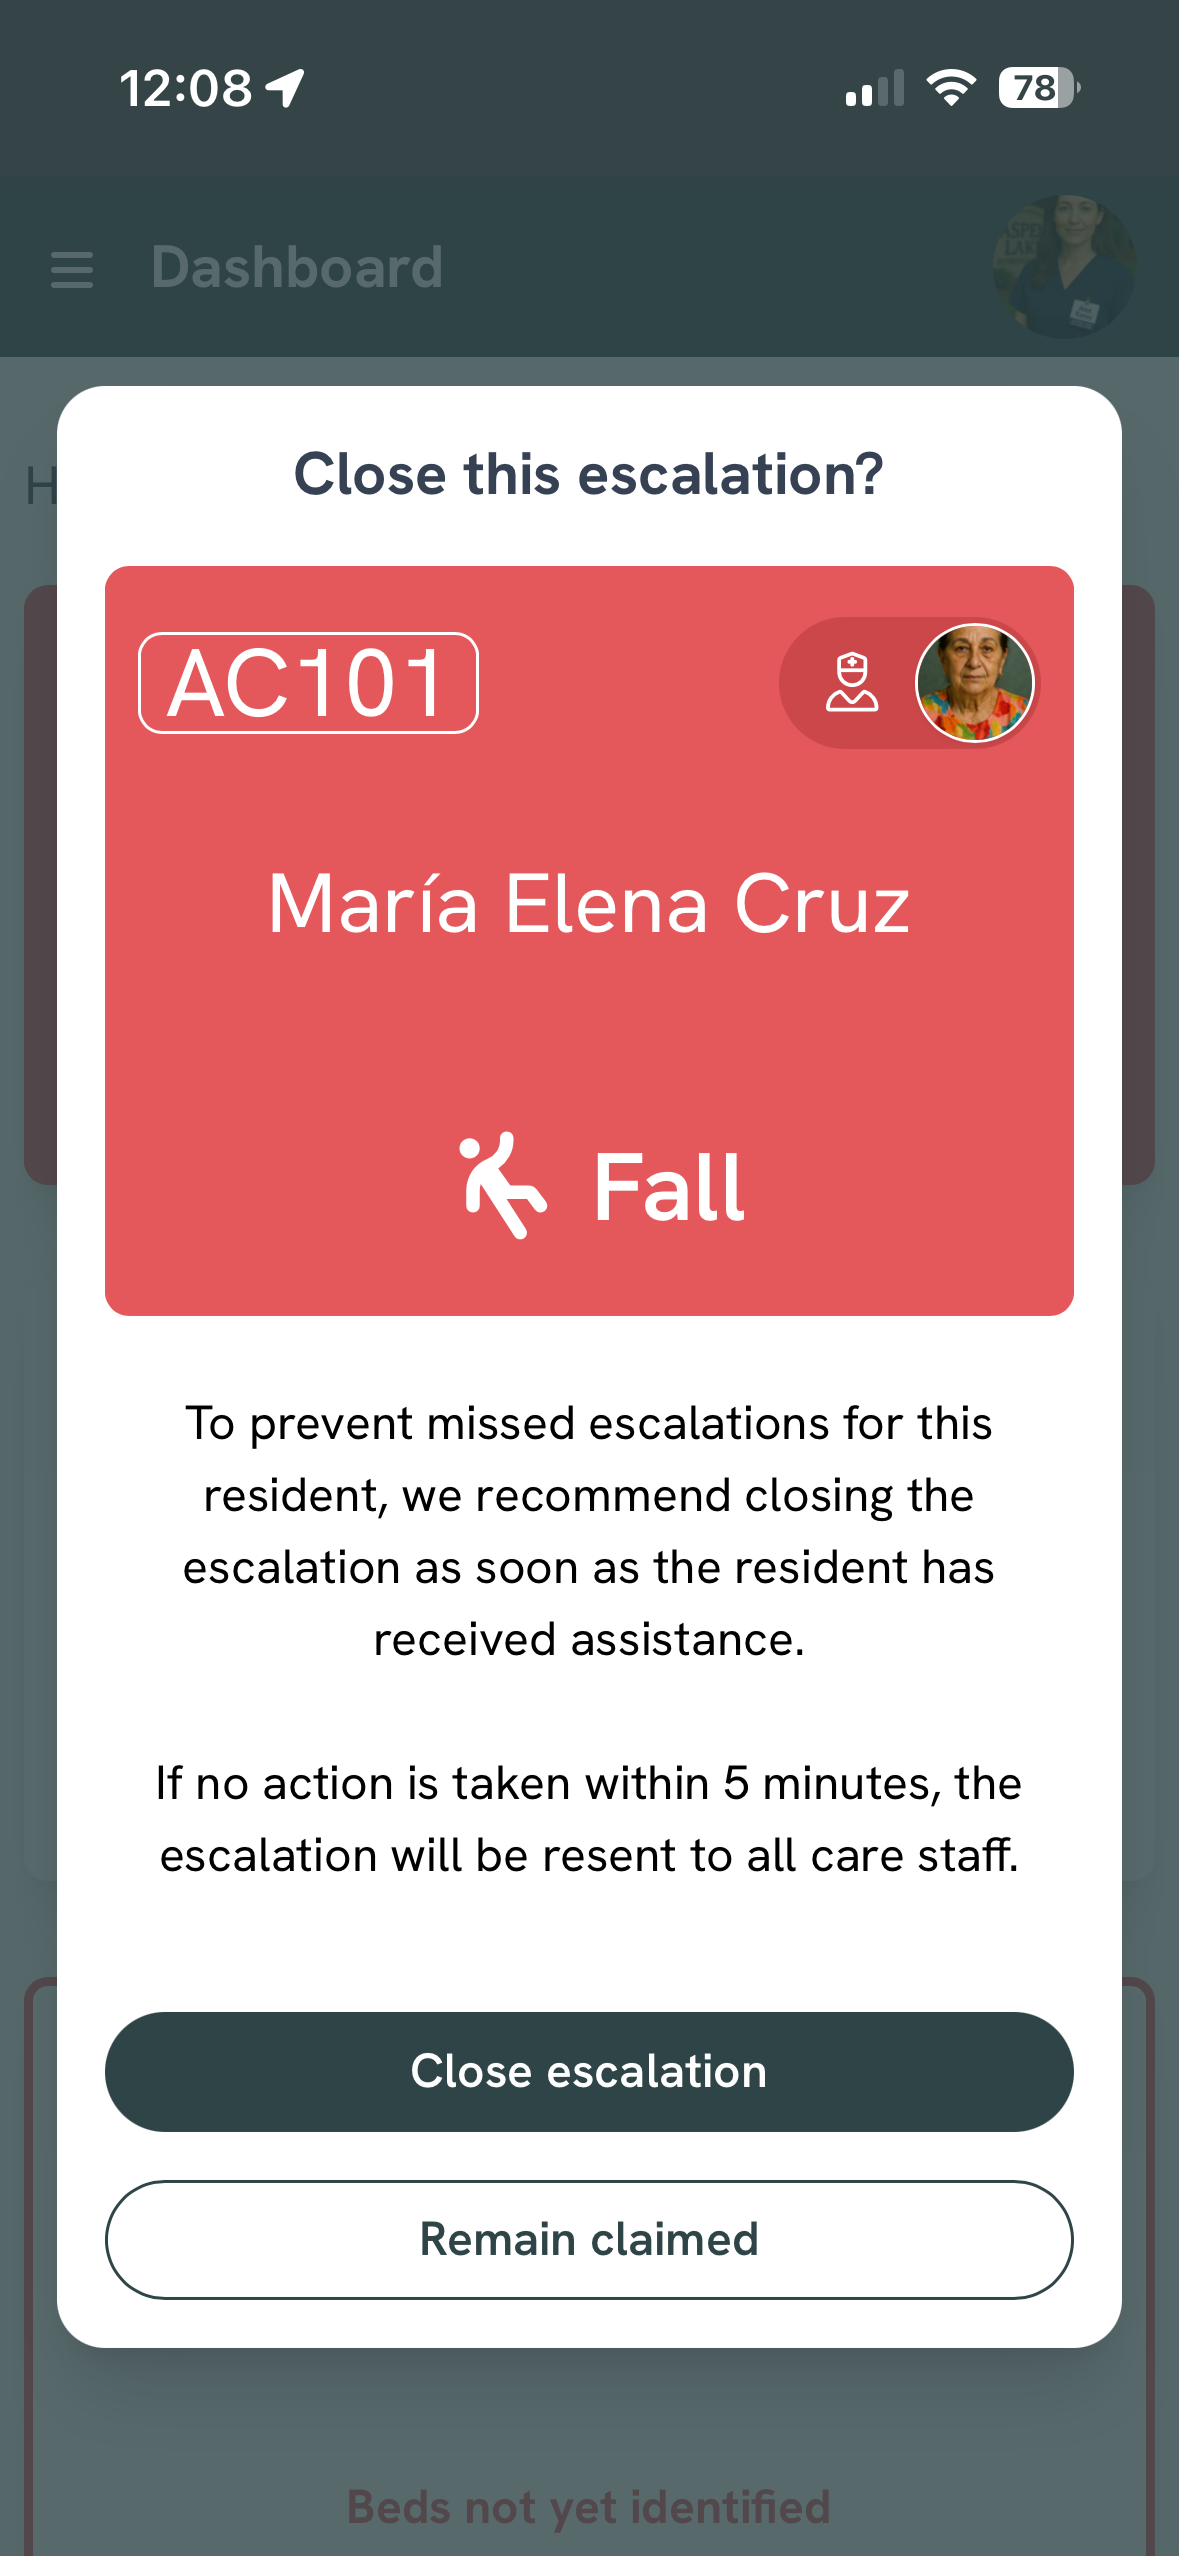
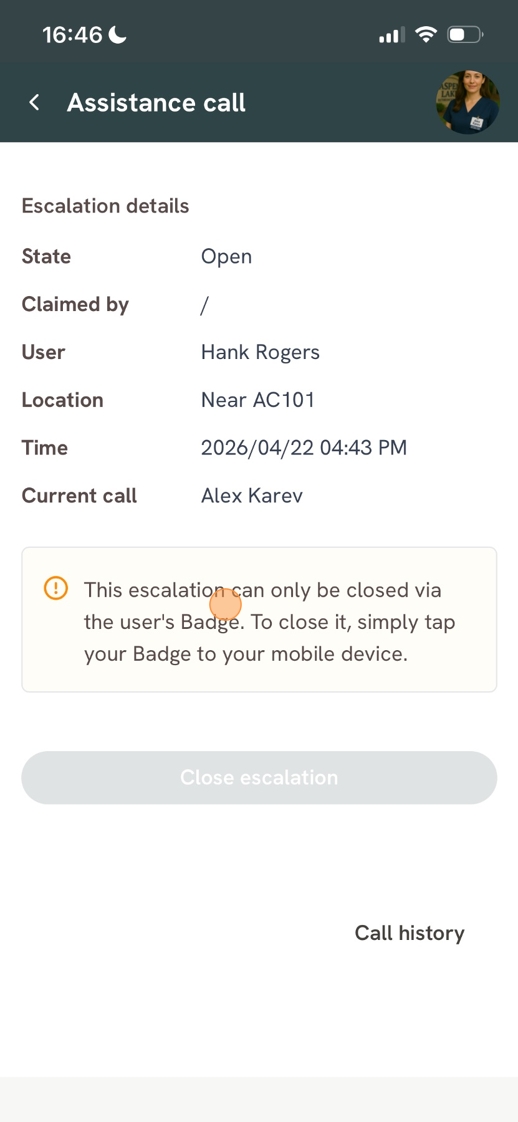
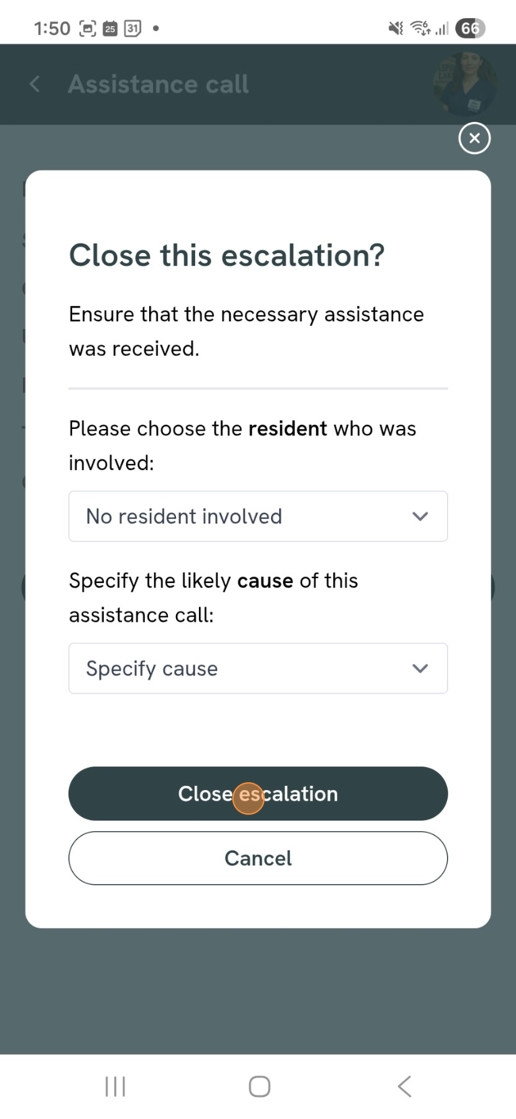
    3. Click on close escalation.
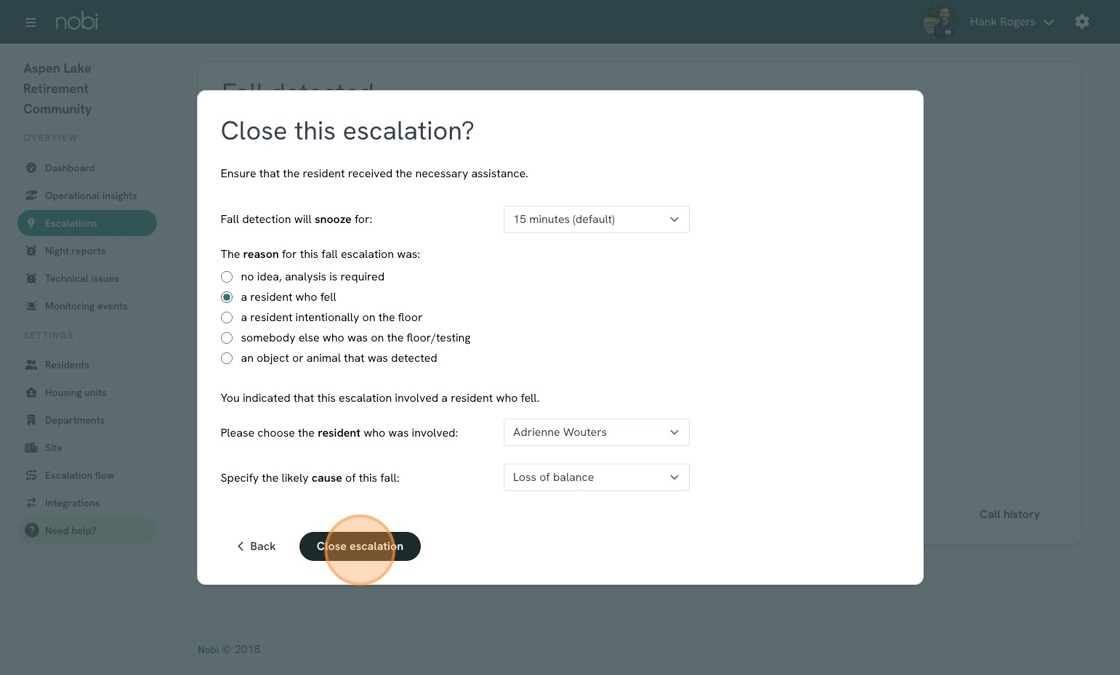
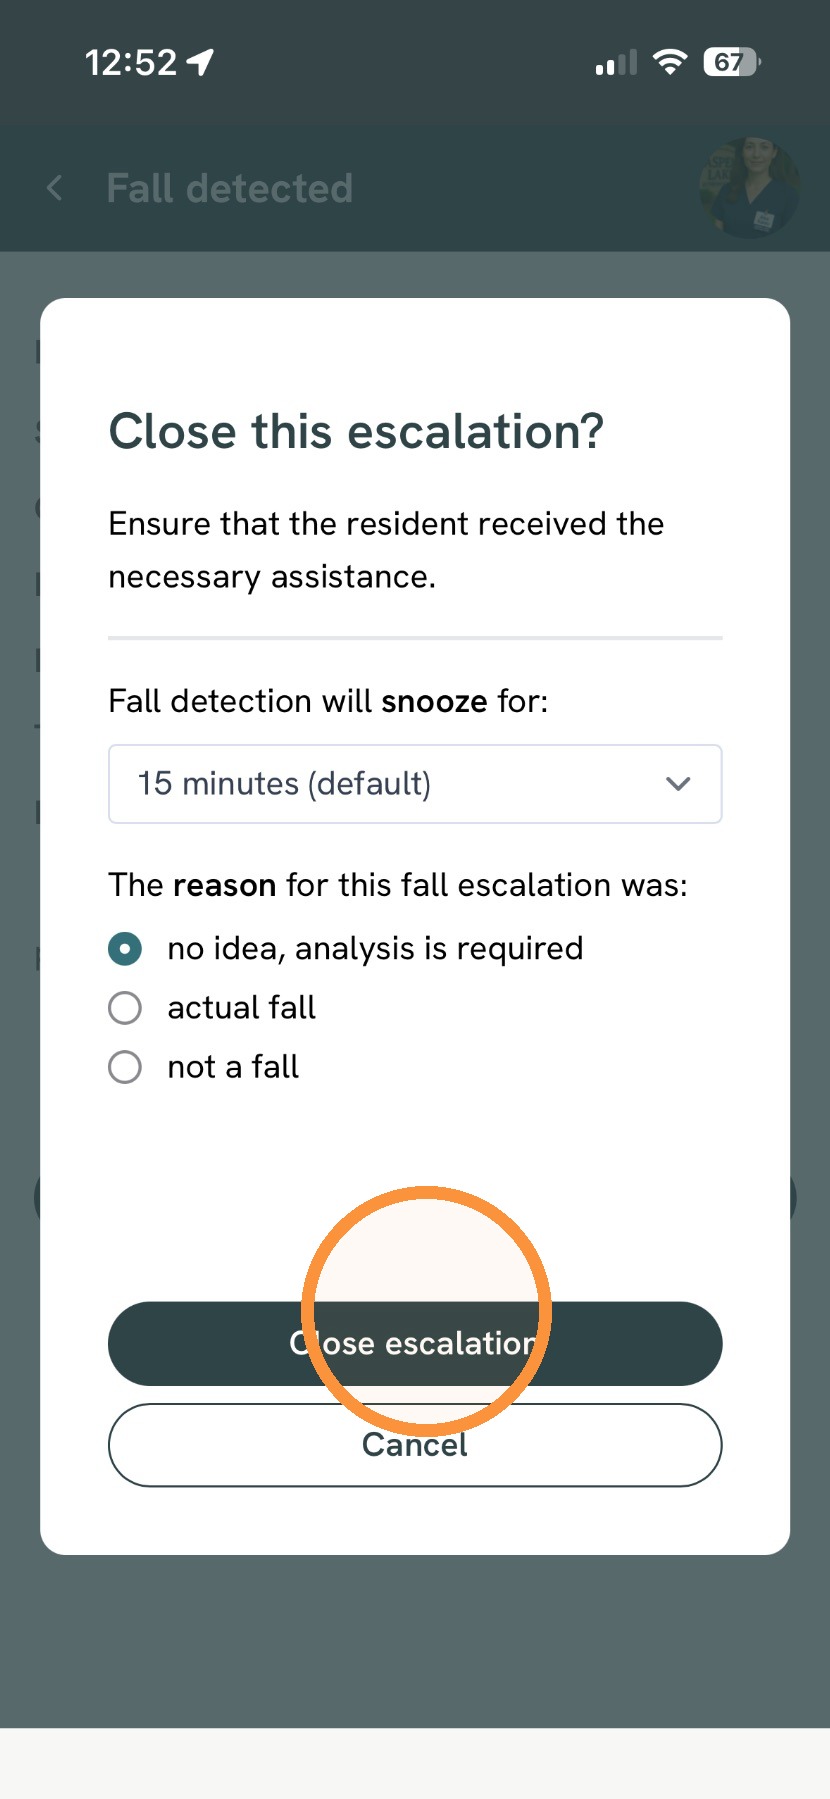
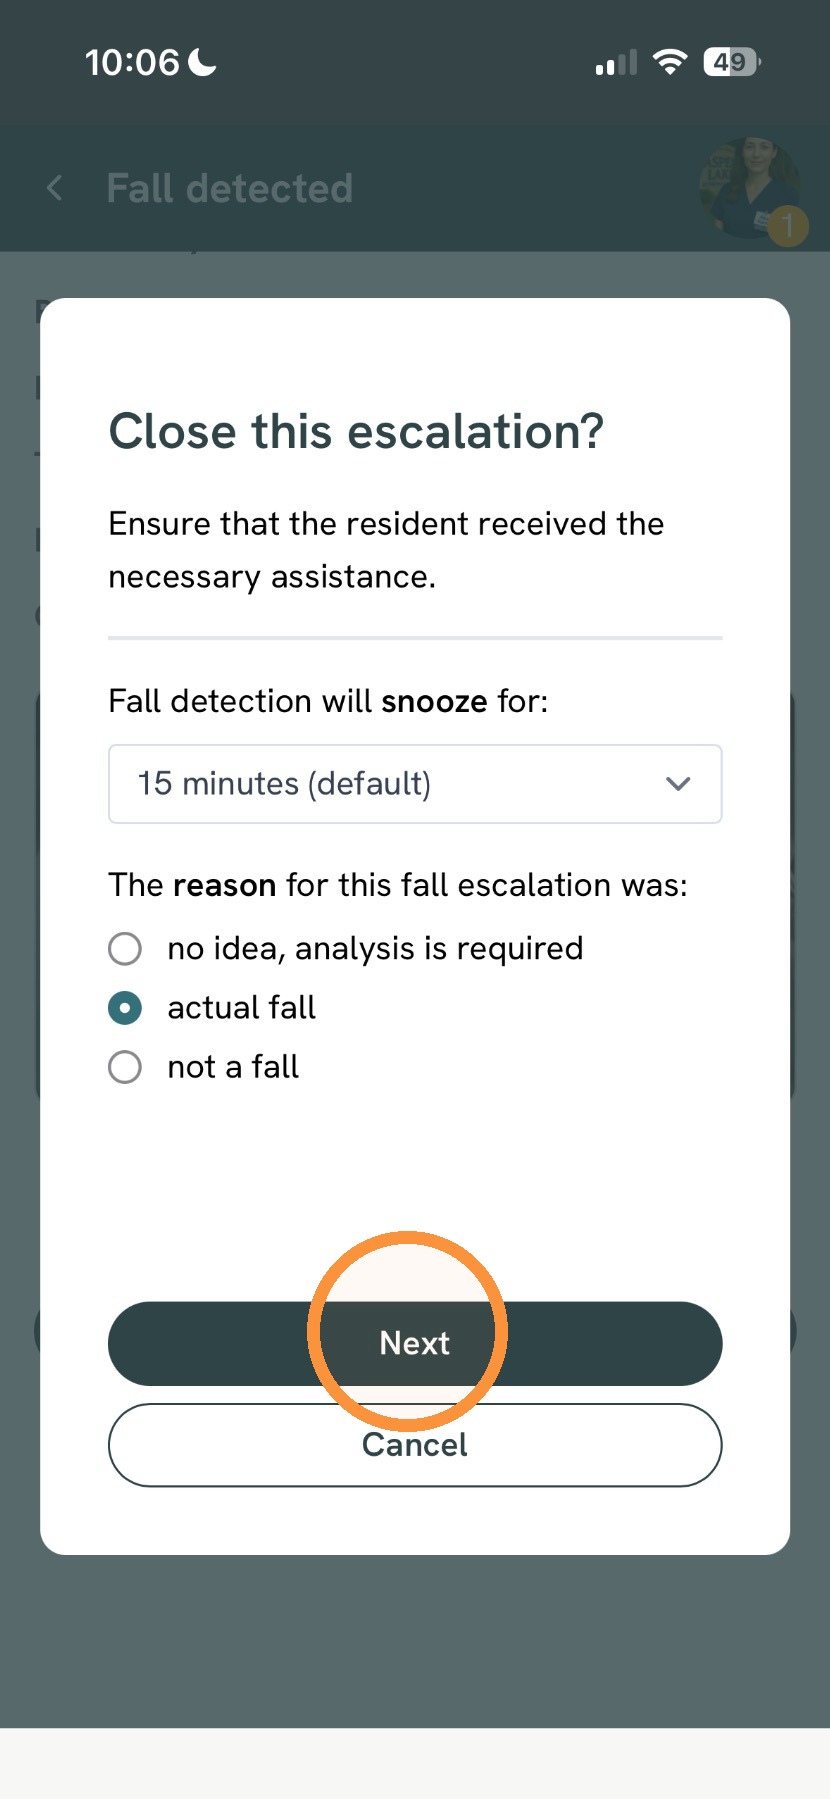
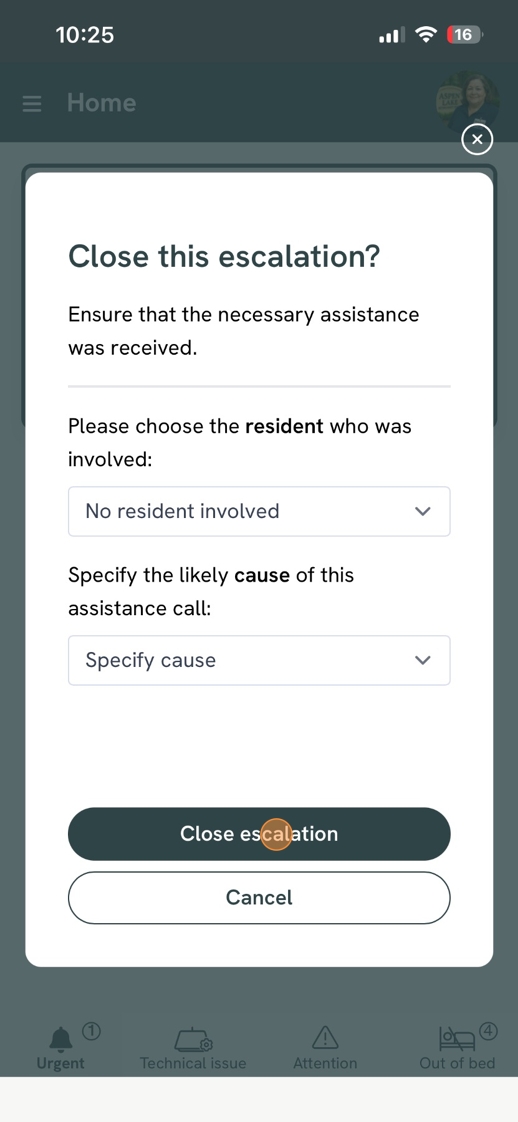
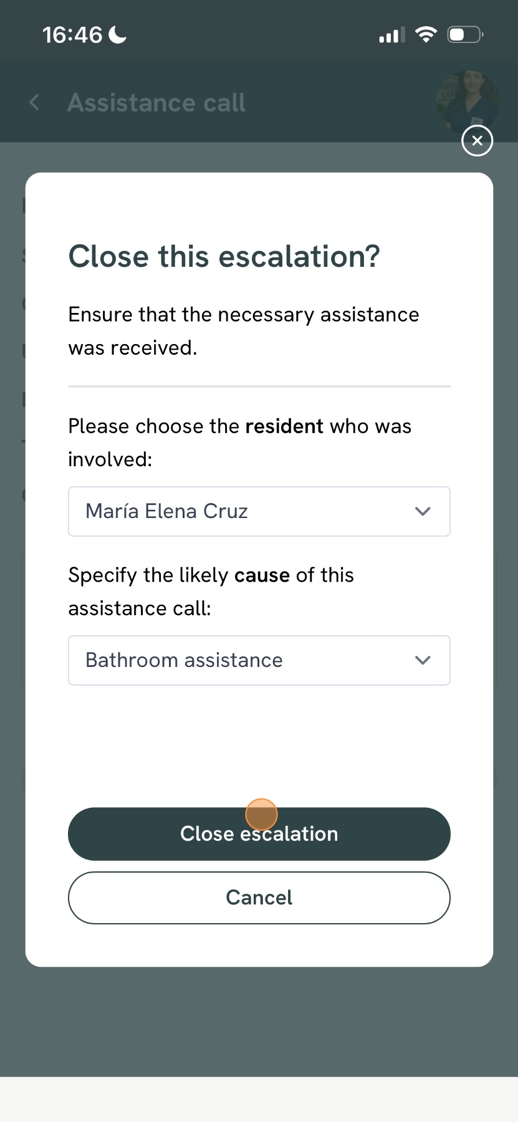
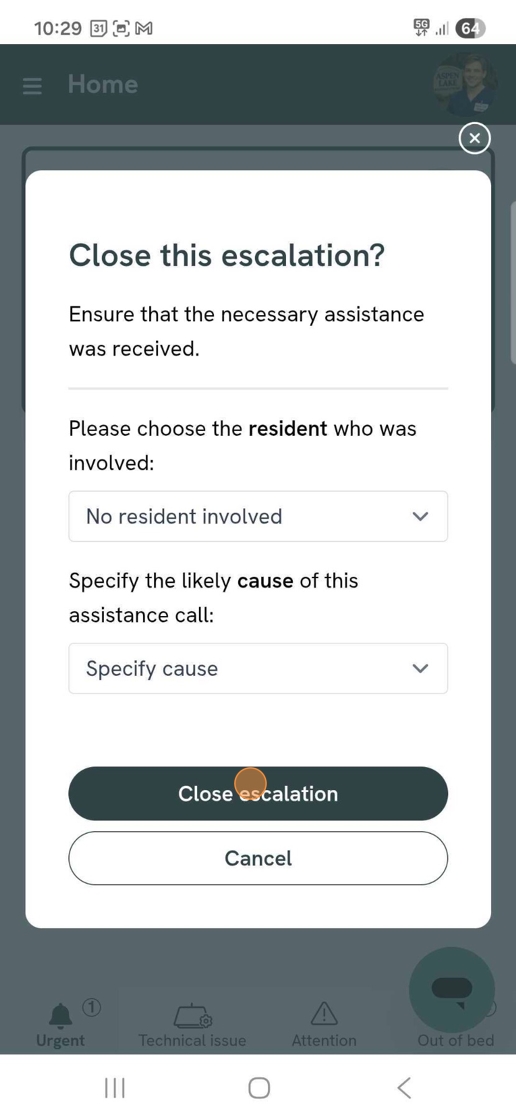
    4. Here you can select the amount of time fall detection will be snoozed for. Nobi will also ask some questions about the escalation as well as the cause of the escalation (if you have configured this, more information → set escalation causes). You can also assign a specific resident to an escalation.
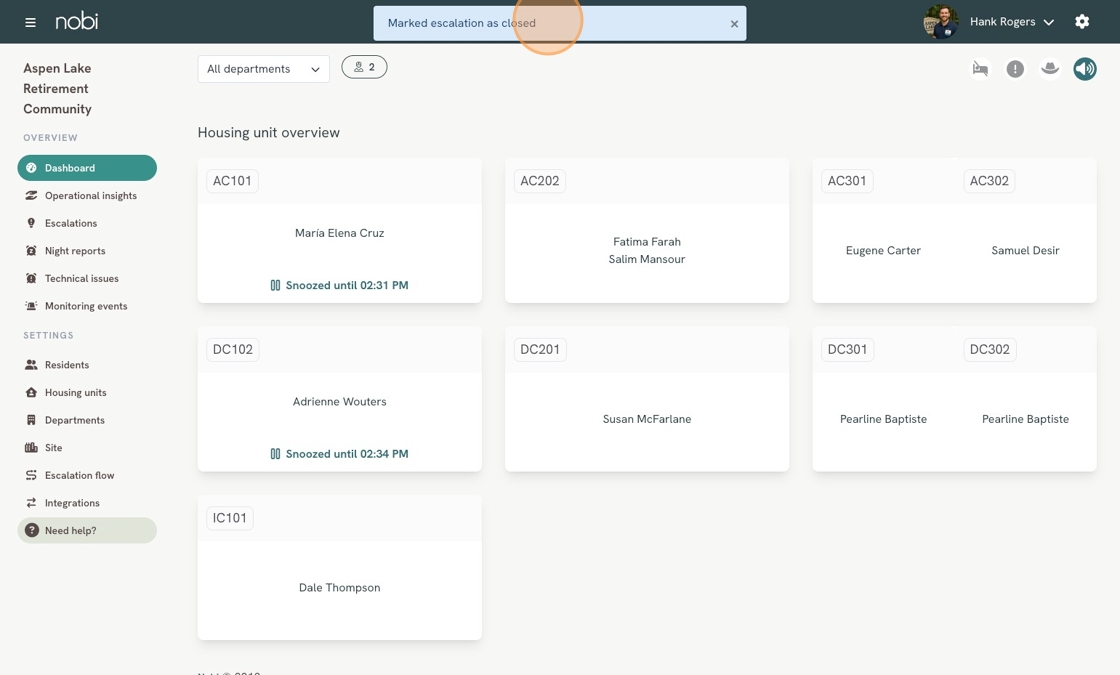
    5. A blue banner will confirm the escalation closure.
    3. Closing with a nurse call system

    When integrated with a nurse call system you can close the escalation in this system itself. This configuration happens in the nurse call system itself, not in Nobi.


    Still have questions? Contact Nobi Support.

  • How to Activate Sound on the Dashboard and Customise Sounds

    Stay informed with sound alerts on the Nobi desktop dashboard, ensuring you never miss an important escalation or monitoring event.

    3 min task

    What

    The Nobi desktop dashboard plays sound alerts for escalations, monitoring events, and calls. You can choose from three different sounds to suit your environment. These can be configured at the Site / Community level. This feature is available only on the desktop dashboard, not in the mobile app. 

    Important: The dashboard must be open and visible on your screen. No sound will play if it’s closed or minimised. The page must also be active, as audio can be blocked by your browser. The make the page active, click anywhere.

    Why

    Sound alerts provide an immediate signal when attention is needed. Caregivers hear a notification as soon as an escalation, monitoring event, or call is triggered. This reduces the risk of missing important updates and supports faster, more responsive care.


    Activating sound on the desktop dashboard

    1. From the dashboard, click the speaker icon in the top right corner to enable sound.
    2. In case of an escalation or call, there will now be a sound.

    Choosing between different sounds

    1. Go to Site / Community in the left menu.
    2. Scroll down to sound. Choose your desired sounds for both new escalations and new monitoring events using the dropdown menu. A preview of the sound will play when selected.
    3. When you're finished, click Save.
    4. A green banner will confirm the selection.


    You have now changed the sound for new escalations, monitoring events, and calls.

    Still have questions? Contact Nobi Support.

  • How to Navigate the Dashboard on the Nobi Web Application

    In this article you will understand how to use the dashboard in the Nobi web application. The dashboard helps you get a clear, real-time overview of residents and alerts, so you can respond quickly when needed.

    5 min task

    What

    The dashboard shows you everything happening in your care home in real time. You can see all residents, active alerts, and what is happening in both private rooms and shared spaces.

    From the dashboard, you can quickly see who is out of bed, where help is needed, and if there are any technical problems that might affect care.

    From this one screen, you can respond quickly using the Priority view, open details for any resident, or manage requests through the section for personal and communal calls.

    Why

    The dashboard helps you to provide timely and focused care. It shows you exactly where your attention is needed—whether that’s a fall, a resident call or if there are active monitoring events. You won’t miss escalations or assistance requests. 

    With colour-coded resident cards, icons, and quick access to details, you can make confident decisions and deliver support without delay.


    Dashboard overall

    Switch views when needed
    Use the buttons to enable or disable the following dashboard views:

    • Out of Bed view: Only view residents who are currently out of bed. This button is reflected as a bed with a strip across it. 

    • Private mode: Hide resident names and profile pictures (this view can be used with other views). This button is reflected as a hat.

    Sound notifications

    • Tap the speaker icon in the top right corner to turn dashboard sound alerts on or off. Learn more about Sound on the Dashboard here.

    Use the Priority view
    Priority view can be enabled and disabled by clicking the icon with the exclamation mark in the top right corner.

    When Priority view is enabled It shows the following:

    • Urgent: Open escalations,  (falls, resident calls, or assistance calls.)

      When active, escalations will appear in Urgent, including:

      • Falls

      • Resident calls

      • Assistance calls from staff badges

    • Technical issue: any active technical issues with Nobi or connected peripherals. These will appears as a white resident card with a red outline. Clicking on the resident card with the issue will provide more information about the issue, including start time, duration, and suggested fixes. More information on all ongoing and resolved technical issues can be found in the Technical issues overview in the left menu.

    • Attention: Active monitoring events. Click on the active monitoring event to see more information about the event, including start time and duration. 

    View resident-specific information

    • Tap a resident card to open their personal view

      • Check if live view is enabled. 

      • Click their name to visit their Resident insights page.

      • View the latest sleep data, or the resident's parameters from any connected peripherals

    Choose your department

    • Use the dropdown in the top left corner to select the department you want to see.

    • Whether or not in priority view, the filter allows you to see only departments selected.

    Housing Unit Overview

    • When priority view is disabled, each housing unit is shown as a card.

    • Single, multi-person, and Jack and Jill units display the residents in those housing units.

    • Common rooms are not shown by default.

      • If there is a fall or call in a common area, it will appear automatically in either the Personal and communal calls section or the Housing unit overview.

    • If fall detection is snoozed, the snooze may be shown here on the resident card. The following snoozes will appear on the resident card:

    • When there is a fall, the housing unit will turn red and a fall icon will be visible. 

    Using the Escalations via Nobi Mobile App feature

    • If the Escalations via Nobi Mobile App feature is enabled, you will be able to see the number of available caregivers currently singed in via the icon.

    • Clicking the icon will give you more details about who is signed in, which working area(s) they're assigned to, the device(s) they're signed in on, what time they signed in, and the duration of their current sign in period. You can also sign out users by clicking the Sign out

    Personal and communal calls section

    • When Priority view is turned off, this section appears at the top of the dashboard when there are active calls or assistance calls. This section disappears when no calls are active

    • When there's a call, it displays active calls not tied to resident cards:

      • Resident calls in a common area

      • Wearable call requests

      • Calls or assistance calls from shared areas (only when active) 

    Understand assistance call behavior

    • White: Assistance was requested without an active escalation

    • Red: Assistance was requested during an active fall or call, after the escalation was claimed in the Nobi Mobile App

    Using the dashboard on the desktop helps you quickly understand what is happening across your care home and act on it immediately. The dashboard helps you focus on priorities and respond with confidence.

    Still have questions? Contact Nobi Support.

  • How to Change a User's Phone Number

    In this article you will learn how to change the phone number of a user on the Nobi application.

    2 min task

    What

    A user with the role of account manager or manager can update phone numbers through the User management page in the Nobi application.

    Please note: A user can only have one phone number linked to their account.

    Why

    When an escalation occurs, users can be contacted by phone according to the structure of the escalation procedure. If the Escalations via Nobi mobile app feature is enabled, phone numbers are used as a fallback contact method when available caregivers do not respond. 

    Keeping phone numbers up to date is essential to ensure that everyone is reached quickly and reliably during escalations.

    Having correct phone numbers is critical because:

    • It ensures that the right people are notified during escalations.
    • It prevents missed or delayed calls in urgent situations.
    • It keeps the escalation procedure running smoothly.

    Detailed steps

    With the role of account manager or manger, change the number of a user by following the steps below.

    Please note: This action can only be completed on the Nobi web application via the User management page. Access to this page is restricted to managers only.

    1. From the dashboard, click the cog/gear in the top right-hand corner of the screen to access the User Management page.
    2. Locate the user you wish to change the phone number of and press Edit.
    3. Navigate to the phone number field and update the phone number here.
    4. When you're finished, press Save.
    5. A blue banner on the User management page will confirm the update.

    You have now changed a user's phone number.

    Still have questions? Contact Nobi Support.

  • How to Reactivate Users

    In this article you will discover how we can unarchive and reactivate users on the Nobi application.

    3 minute task

    What

    In the Nobi application, certain items—such as housing units, users, and residents—can be archived and later reactivated. Once reactivated, they become active again in the system.

    Why

    To ensure important data remains accessible and the system stays reliable, most items in Nobi—such as housing units—can be reactivated after being archived. Reactivation allows you to quickly restore access if, for example, a staff member returns or a housing unit becomes active again. This approach safeguards past data, such as escalations or settings, and ensures nothing valuable is lost. While some items like departments can be deleted when appropriate, archiving and reactivation keep the system stable, legally compliant, and ready for future use.

    Click here to read our guide on archiving users.


    Detailed steps

    Follow the steps below to reactivate users.

    Please note that this action can only be completed on the Nobi web application via the User management page. Access to this page is restricted to managers only.


    To reactivate a user:

    1. As a manager, click the cog/gear in the top right corner to access user management.
    2. The names of users who have been archived will be grayed out and at the bottom of the User Management page. Or, alternatively, use the filters to filter by User status. Navigate to the user you wish to reactivate and press the grey file box with the up arrow, next to the user.
    3. Confirm that you wish to reactivate the user. 
    4. A green banner will confirm the user's activation.

    The user has now been reactivated. 

    Still have questions? Contact Nobi Support.

  • How to Consult and Edit Your Profile

    In this article we’ll guide you through changing your profile, checking your in-app messages, as well as signing out of the application.

    3 min task

    What

    In the Nobi application, you will find your profile at the top right of the screen. This section easily allows you to view your messages, edit your profile, set a profile picture or avatar, and sign out. If you have unread messages, Nobi will display a notification next to your profile, highlighted in orange. These notifications keep you informed about Nobi updates, such as new or enhanced features.

    Why

    Significant updates or changes will be directly communicated through in-app messages, ensuring you're always in the loop. Should your personal details, like email address or phone number, change, it's essential to update your profile promptly. This ensures Nobi continues to perform at its best.


    Consulting/updating your profile

    If some information about your user profile has changed, you can update it.

    Detailed steps

    1. Click on your name in the top right corner.
    2. Choose edit profile.
    3. Here you can change your personal information, including phone number, language, and profile picture or avatar.
    4. Once you’re done, click Save.


    Viewing your in-app messages

    In the app, you’ll immediately see if you have any unread messages. If you have them, you will see them highlighted in orange in the top right, next to your profile. Follow these steps to access them:

    1. Click on your name in the top right corner and choose messages
    2. Here you’ll see an overview of all your messages with the date of creation as well as the category. The unread messages are indicated with an orange dot at the left hand side. Click on the messages to read the entire message
    3. Once you’re done, click Close

    Signing out of the Nobi application

    Lastly, signing out of the app is also done with one of the options nested under your profile:

    1. Click on your name in the top right corner and choose sign out
    2. You are now signed out of the Nobi application.

    Still have questions? Contact Nobi Support.

  • How to View an Overview of Monitoring Events

    Discover the overview of monitoring events in the Nobi application.

    3 min task

    What

    When you’ve configured monitoring events in the Nobi application, a list of all monitoring events will be generated in the overview of the monitoring events. This list contains the following data for each monitoring event (ongoing and closed): the housing unit, the resident, the current status, the trigger, the time at which the event started/ended, and the event’s duration.This list can also be filtered on department, resident, trigger, and status.

    Not sure of how to set up these monitoring events? Learn How to Configure Monitoring Events by reading our guide.

    Why

    Displaying monitoring event icons on the dashboard and getting notifications are great for quick responses. But to really understand and track each event and see the bigger picture, the overview of monitoring events is key. It gives you a bird's eye view of all events, making it easier to notice trends and decide when to take action.


    Consulting the monitoring events overview

    Viewing the list of monitoring events is simple and can be done under ‘monitoring events’. For this example, we will consult the list of all open and closed events.

    Please note that you can also get an overview of a resident's active monitoring events at a glance via the Resident Insights.

    Detailed steps

    1. Click on Monitoring events in the left menu. The list of all open events will be displayed here.
      How To View Monitoring Events Dashboard - Step 1.png 
      • Use the dropdown menus at the top to filter the data. You can filter on department, resident, type of trigger, and the status (ongoing, closed, or all statuses).
      • To view all of the open and closed events, choose all statuses in the status filter in the upper right corner. How To View Monitoring Events Dashboard - Step 4.png
      • To view only the information about a specific monitoring event, click show on the right hand side. How To View Monitoring Events Dashboard - Step 2.png

    You have now consulted the overview of monitoring events. 

    Still have questions? Contact Nobi Support.

  • How to View Night Reports

    Discover how to access and interpret Nobi night reports, and learn how they contribute to better resident care.

    5 min task

    What

    Nobi's night reports monitor and compare residents' time in bed and time out of bed during the night. It will also display the residents' bedtime. These overviews can be filtered by department, allowing for a detailed view of individual residents' sleep patterns. You’re able to access weekly, and daily night reports for the residents.

    The dashboard itself also provides a compact view of the previous night for each resident.
    Night reports monitor the period from 7 p.m. to 11 a.m.

    Night reports are only available if a resident has Smart monitoring enabled. Night reports are also not available for residents in multi-person housing units.  

    Why

    Night reports provide insights into a resident's sleeping patterns, which are crucial for identifying changes that may indicate or contribute to health issues. These reports offer a non-intrusive way to monitor a resident's sleep behaviour, keeping you informed without disruption.

    Interpreting night reports can also help you determine whether or not a resident would benefit from the Night Light feature. Read more about the feature here.

    Your residents' Night Reports are also available at a glance via the Resident Insights

    Detailed Steps

    Below you will learn how to access night reports.

    1. From the dashboard click Night reports in the left menu.
      Access Sleep Reports for Mary Bradbury - Step 1 (1).png
    2. You can sort the reports by department via the drop down menu.
      Accessing Daily Sleep Reports on Nobi Cloud - Step 4 (1).png
    3. Change the date via the directional buttons.
      Accessing Daily Sleep Reports on Nobi Cloud - Step 2 (1).png
    4. Selecting a resident will show their detailed weekly night reports.
      Accessing Daily Sleep Reports on Nobi Cloud - Step 6 (1).png
    5. Change the week via the directional buttons.
      Accessing Daily Sleep Reports on Nobi Cloud - Step 7 (1).png

    Still have questions? Contact Nobi Support.

  • How to View an Overview of Escalations

    Discover the use of the overview of escalations and how to consult it.

    5 min task

    What

    The escalation overview provides a complete list of all open and closed escalations for the entire site / community. This list can be filtered by cause, resident, or department. You can access detailed information for each escalation and view images for all escalations less than 14 days old. After an escalation has been closed, you can specify the cause of the escalation using this overview. Additionally, the entire list can be exported to an excel file.

    Why

    The overview of escalations gives you a bird’s-eye view of all the escalations in the organisation. As this list grows, you can use it to spot patterns in order to prevent future escalations. Via this list, you can also specify the cause of the escalation, even after it's been closed.


    Consulting the overview of escalations 

    Let’s explore the overview of escalations. 

    Please note, that you can also get an overview of all escalations for a specific resident via the Resident Insights page.  

    Detailed steps

    1. Go to Escalations in the left menu.
    2. You will see the list of all open and closed escalations.
      You can filter these using the drop-down menus above. You’re able to filter them by cause, resident, and department.
    3. You can also export this data by clicking on export in the top right corner of the screen.
    4. Open an escalation by clicking on show
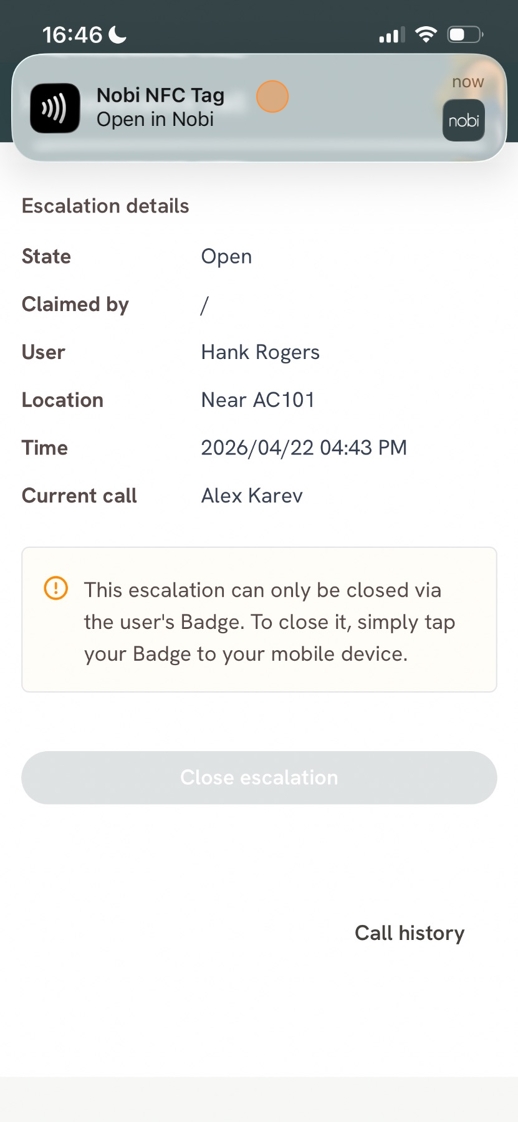
    5. From the Escalation details page, you can see the following information:
    • State - if the escalation is Open or Closed
    • Claimed by - which user claimed the fall or call via the Nobi Mobile App. (Note: if Escalations via Nobi Mobile App isn't enabled, a "/" will appear here.)
    • Resident which resident was associated with the escalation of call. You can learn more about assigning a resident to an escalation here.
    • Location - the housing unit where the escalation or call took place
    • Time - the time the escalation began
    • Closed at - the time the escalation was closed, by which user (if closed using the Nobi Mobile App), and the method of closure (In App, Presence button, etc.). (Note: If the escalation is still open, there will be no closed time.)
    • Room type - the type of room where the escalation or call took place.
    • Cause - the applied cause of the escalation. (Note: if an escalation or call has not been assigned a cause, a Specific cause link will be available to do so.)
    • Analyse - Consult the images of the escalation or a video. (Analysis is not available for escalations in. common areas, or Wearable calls or assistance calls.)
    • Call History - Check the call log to see the sequence and status of calls Nobi made to notify staff about an escalation.

    Still have questions? Contact Nobi Support.

  • How to Use Escalation Images

    Learn how to use escalation images effectively in the Nobi application for a more precise understanding and response to moments of need.

    3 min task

    What

    Both during an open escalation and when viewing a closed escalation, you can use the Analyse button to review images and videos of the escalation. The type of image available depends on the resident’s privacy settings.

    You can learn more about Privacy Settings by reading our Discover page.

    These images help care staff assess the situation in real time and better understand what happened afterwards. During an open escalation, you’re able to take a new image to assess the current situation.

    In the Nobi application, escalation images are available during the escalation and up to 14 days after it has been closed. To view images, at least stick figure or blurred images must be enabled. Not sure how to activate this? Take a look at our page set escalation images.

    Why

    Escalation images help you understand what happened during an escalation, both during the escalation and afterwards. They allow you to see the situation, identify what may have caused the escalation, and make more informed decisions. This makes it easier to identify risks, improve care decisions, and prevent similar situations in the future.


    Comparison of different image types

    Type of Image How Private How Much Detail Shows Room As Is? Learn About Escalation?
    No image Most private None No  No
    Stick figure Medium privacy Some (stick figure) No, shows last picture of empty room Limited
    Blurred images Medium privacy Some (blurred) Yes, blurred Limited
    Actual image Least privacy A lot (real image) Yes, live background Yes, most

    Detailed steps

    Consulting escalation images (open escalation)

    During an open escalation you can view the images and also take a new image to see the current situation. 

    1. In the Dashboard, click on the resident with the open escalation.
    2. Click Next steps.
    3. Choose analyse.
    4. Click on Get new image.

    Here you will see the different images taken of the escalation. Below you can see Nobi’s description of the pose. 

    Consulting escalation images (closed escalation)

    The escalation images are found at the level of the escalation itself. For this example, we’ll consult the stick figure images of a fall.

    1. Click on Escalations in the left menu.
    2. Choose the escalation you want to open and click show.
    3. Choose analyse.


    Here you will see the different images taken of the escalation. Below you can see Nobi’s description of the pose. 

    Avoiding unexpected alerts:

    If Nobi triggers a fall escalation but no fall has occurred, you might find it helpful to check the escalation images to understand the cause. Simply open the images and read Nobi's description. For example, if you see an image of clothing on the floor labelled ‘lying on floor,’ you'll know that this was mistaken for a fall and triggered the escalation. 

    Since Nobi is capable of self-learning, it will gradually recognise that this isn't a fall. However, this process takes time. If you're looking for immediate solutions, we recommend visiting our page on Unexpected escalation and how to avoid it.

    Still have questions? Contact Nobi Support.

  • How to Use the Presence Button

    Discover the two uses of the presence button in this guide.

    1 min task

    What

    The Presence Button is a button that is connected to a single housing unit and serves two key functions. Pressing it closes an open escalation in the housing unit (we call this reactive use of the button). It also activates an irreversible 15-minute snooze period for the housing unit (the proactive use). Repeated presses simply reset the timer, ensuring the snooze duration never exceeds 15 minutes. This button should not be used by residents, so we recommend installing the presence button out of residents' reach and away from existing light switches.

    Why

    Proactive use: 

    Pressing the presence button will snooze the housing unit for 15 minutes. This gives care staff time to perform care/cleaning activities on the floor without Nobi creating an escalation. 

    Reactive use:

    It takes just one press of the button to close an escalation with the presence button. Using the app for this involves extra steps.

    Using the presence button

    The presence button is a peripheral which first needs to be paired with the light. Learn How to Pair the Presence Button - Nobi Button by reading our guide.

    You can learn more about Different Ways of Snoozing Fall Detection by reading our discover page.

    Detailed steps

    1. Press the presence button.
    2. Snoozed (button) will appear on the housing unit card where the button was presses.
    3. This will snooze fall detection in that specific housing unit for 15 minutes. If in a Jack and Jill housing unit, it will only snooze the room for which the button has been pressed. It will also close any open escalation within this housing unit. If you’ve enabled the voice of Nobi, the light will give confirmation that the escalation is closed.

    In the application

    In the dashboard, you can see the resident whose housing unit is snoozed by the presence button.

    Still have questions? Contact Nobi Support.

  • How to Move a Resident to Another Housing Unit

    Learn how to move residents from one housing unit to another. 

    2 min task

    What

    With the Nobi application, residents are linked to housing units. When a resident relocates from one housing unit to another, you must move this resident to the new housing unit on the Nobi application.

    Why

    By moving the resident when they relocate to another unit, we keep all of the resident’s data as well as their privacy and housing unit settings. Therefore, there is no need to create a new profile in the other housing unit.


    Moving a resident to another housing unit

    Moving a resident to another housing unit is simple and can be done in the housing unit settings of the resident.

    Detailed steps

    1. Go to Residents in the left menu.
    2. Navigate to the resident and click edit.
    3. Navigate to the Housing unit tab.
    4. Use the dropdown menu to select the housing unit. This will show you each department along with their housing units and how many people are currently living there.
    5. Click on the desired housing unit, next click on save.
    6. A green banner will confirm the changes.


    You have now successfully moved a resident from one housing unit to another.

    Still have questions? Contact Nobi Support.

  • How to Check the Live View

    In this guide you will learn how to check a resident's live view.

    1 min task

    What

    Live view functionality in Nobi provides an abstract view of the resident whenever they are in their room but not in bed. This abstract view displays the resident as a stick figure so the resident’s privacy is protected. The background of these images is a still image taken from the last time the room was empty, further ensuring privacy protection.

    Why

    At night, live view makes it easy to ensure residents who might fall or wander are safe. If there's a fall, live view helps caregivers to see what's happening fast so they can react quickly. It's also handy for regular check-ins on residents, without disturbing them.


    Conditions to view Live View

    Live view is only available on Nobi lights, and not on the Nobita when Smart Monitoring has been activated. To respect the resident’s privacy, you will not be able to see anything when the resident is in bed or out of the room. When a resident is in bed, a small icon of a bed will appear to the right of the resident's housing unit number on the dashboard:

    Screenshot 2025-06-16 at 16.04.06.png

    When this icon is visible, live view is unavailable. 

    Live view works in multi-person and Jack and Jill housing units, but these rooms use the most restrictive privacy settings by default. This means that if a resident in a shared space has stricter privacy settings, live view may not be available.

    The stick figure representation of the resident is the only available view. It cannot be removed, and no actual images of the resident are available via Live View beyond this stick figure representation.

    Checking the Live View

    To access this live view, it needs to be activated in the resident’s privacy settings.

    Not sure how to activate this feature? Read How to Enable Live View.

    You can also view the status of the live view via the Resident Insights.

    Detailed Steps

    1. On the Nobi dashboard, click on the resident whose live view you want to see.
    2. The live view of the resident will now open up on the right side of the screen.
    3. Close the live view by pressing the small x in the top right corner of the pop up window.

    You will now be able to view the stick figure. If the resident is not present you will only see ‘no resident detected’ appear. If the resident is in bed you will only see ‘resident in bed’.

    It is also possible to consult the Live View during an active Fall or housing unit-related call. This is not available for Wearable calls or Assistance calls. To learn more about consulting the Live View during an escalation, visit our guide here.

  • How to Take a New Image During an Escalation

    Learn how to take a new image during an open escalation.

    2 min task

    What

    As long as an escalation is still open, it’s possible to take a new image to better understand the current situation. This can be done when viewing the escalation.

    Consulting images is only possible if either the abstract or actual escalation images are chosen for this resident. For more information about escalation images, please refer to our Consult images page.

    Why

    Critical situations can escalate quickly, and the escalation images do not update automatically during an open escalation. If you are unable to assist the resident personally, taking an additional or new image of the situation is particularly useful. This allows you to monitor what’s happening, even if someone else is helping the resident, and call for additional help if needed.


    Taking a new image

    In order to take a new image, you need to have opened the escalation itself and it still needs to be active. 

    Detailed steps

    1. In the dashboard, you’ll see in red indicated the fall or call icon next to the name of the resident in need. Click on the resident. Please note, if you’re using the mobile app, you can directly go to the escalation via the ‘home’ menu.
    2. Click on Next steps.
    3. Click Analyze.
       
    4. Click on Get new image.


    You will now see a new image of the room.

    Still have questions? Contact Nobi Support.

  • How to Consult Images and Video

    Learn how to consult images of an escalation to better assess the situation.

    5 min task

    What

    When Nobi triggers an escalation due to a fall or a resident pressing the call button, you can view the images of the escalation to assess the situation. Depending on the resident’s privacy settings, you may see no image, stick figure images, blurred images, or the actual images.

    Nobi adds descriptions to each image, such as ‘lying on the floor,’ to clarify what’s happening. You can access these images during the escalation and for up to 14 days afterwards. Additionally, for as long as the escalation is open, you have the option to request new images to get an updated view of the current situation.

    Why

    Being able to view the images of an escalation is helpful for multiple reasons. During the escalation some visual assessment can be crucial in deciding the type of response required. After the event, analysing the images of the fall can provide insights and can help you understand and stop future falls. This can be done because Nobi does not only show the images of the fall but also the images leading up to the fall.


    Consulting images and video of an escalation

    Depending on the type of escalations, different images will be shown.

    Type of escalation Images shown Able to request a new image (open escalation)?
    Fall Images leading up to fall, and fall itself Yes
    Call button / Pull cord / Wearable Call button version 1 Images leading up to the call button being pressed Yes
    Wearable call button Analysis not possible Analysis not possible
    Assistance call (Badge) Analysis not possible Analysis not possible

    Viewing images and video during and after an escalation involves different steps, so we've separated the instructions for each scenario to make it easier to follow. In this example, we want to consult the images for a resident who has chosen for the actual images of a fall to be available.

    Please note, analysis is not possible for Wearable calls and Assistance calls.

    Detailed Steps

    During an escalation

    1. In the dashboard, click on the resident’s name in the red card. Please note, if you’re using the mobile app, you can directly go to the escalation via the Home menu.
    2. Click Next steps.
    3. Here you will see a Live View of the open escalation, as well as additional fall or call escalation details. Click on Analyse. 
    4. Here, you will see the images from the escalation, each with its own description. 
    5. Click on Get new image for an updated view of the situation.
    6. Only possible with the actual images: Toggle on Show detected poses to remove the stick figure from the image.
    7. You can also view a of video of the event if the resident's privacy settings allow it. Click on video.
    8. To play the video, scroll down and press play on the player.

    After an escalation is closed

    1. Go to Escalations in the left menu.
    2. Search for the escalation and click on show.
    3. Choose click Analyse. Here, you will see the images from the escalation, each with its own description. 

       
    4. Only possible with the actual images: Toggle on Show detected poses to remove the stick figure from the image.
    5. You can also consult a video of the event, if the resident's privacy settings allow it. Click Video.
    6. To play the video, scroll down and press play on the player.

    For more guidance about how to interpret these images, go to Use escalation images.

    Still have questions? Contact Nobi Support.

  • How to Call Back Resident During an Escalation

    Discover what needs to be set up to call the resident during an escalation and also how to do it.

    3 min task

    What

    During an open escalation, you can call a resident through their light. This calling feature is only active during an open escalation. When you choose to call the resident, Nobi will call your linked phone number and connect you with the resident's light.

    Why

    There are various reasons why you might need to call the resident through the light. For instance, if you are aware of the escalation but Nobi hasn't called you yet because you're further down the call list, you can proactively use the app to contact the resident. This can be a great way to reassure and comfort the resident while waiting for help to arrive.


    Call back resident

    Calling back the resident is a feature only available if your user is added to the phone number list in the escalation procedure. If you, instead, manually filled in a phone number in the escalation procedure, this feature will not work. Go to set escalation procedure for more guidance about how to set up this procedure.

    Detailed Steps

    1. On the dashboard, click on the red resident card during an escalation. Please note, if you’re using the mobile app, you can directly go to the escalation via the ‘home’ menu.
    2. Click Next steps.
    3. Click on Call.
    4. You will receive a confirmation message saying that you will shortly be contacted by Nobi. Nobi will call the number linked to your user and connect you to the resident through the light. You can now talk to the resident. When you’re done, simply hang up the call.

    You have now called back the resident though the light.

    Still have questions? Contact Nobi Support.

  • How to Snooze an Escalation in the Web Application

    In this article, we will explain what snoozing of an escalation is and how to do it in the Nobi application.

    1 min task

    What

    Using the Nobi web application, you will have the option to snooze an escalation instead of just closing it.

    This action, along with closing the escalation, ensures no new escalations are triggered for a set duration. In other words, the fall detection for the specific housing unit will be snoozed for a certain amount of time. 

    This will also be visible on the dashboard. You are able to remove or change the snooze at any time. After this time, Nobi will send alerts again when it detects falls.

    You can also use a presence button to snooze a housing unit for 15 minutes.

    Why

    In some cases, you might want to snooze an escalation. For example, if a resident is safely sitting on the floor, you wouldn’t want to receive constant alerts. Or, if it takes longer than expected to help a resident who has fallen, you can snooze the escalation for a certain amount of time. This stops staff from getting too many alerts about a situation they're already handling.


    Detailed steps

    1. During an open escalation, on the dashboard, click on the red resident card. Please note, if you’re using the mobile app, you can directly go to the escalation via the ‘home’ menu.
    2. Click on Next steps.
    3. From the Fall escalations details screen, click Close escalation.
    4. A default snooze time of 15 minutes will be selected. You can increase or descrease the time via the dropdown menu.
    5. Then select a reason for the escalation. If you are unsure of the reason, you can add this information later via the Escalations overview.
    6. You can also assign a resident and an escalation cause.
    7. When you're finished, click Close escalation.
    8. The dashboard will now display a blue banner confirming the escalation marked as closed.
    9. The snooze time will also appear on the resident card. To remove the snooze, click on the time remaining.
    10. You can increase or decease the snoozed fall detection time as needed using the arrows.
    11. To end the snooze, click Stop snooze in the bottom right.
    12. A blue banner will confirm the deletion of the snooze.

    The housing unit is now no longer snoozed as you can see in the dashboard.

    Still have questions? Contact Nobi Support.

  • How to Receive an Escalation via Phone Call

    This article describes how the escalation procedure works if you’ve configured phone numbers.

    3 min task

    What

    If you have set up phone numbers in your escalation procedures, Nobi will call each phone number in the order they have been listed. When you answer, an automated message will inform you about the escalation, specifying the type (fall, resident call, assistance call), the resident or staff member's name, the housing unit, and additionally the room where the escalation occurred. 

    By answering and acknowledging the escalation, you will be able to talk to the resident via two way communication directly through the light.

    Why

    For best practices, adding phone numbers to your escalation procedure is strongly encouraged. Phone calls are perceived with a sense of urgency so you're less likely to miss an escalation. 

    During an escalation, Nobi will keep calling the numbers from the defined escalation procedure until the escalation is confirmed, making sure no escalation goes unnoticed. 

    During a fall or some resident calls, you will be able to comfort the resident with two way communication, useful for when help will take a little longer to arrive.


    Receiving calls - open escalation 

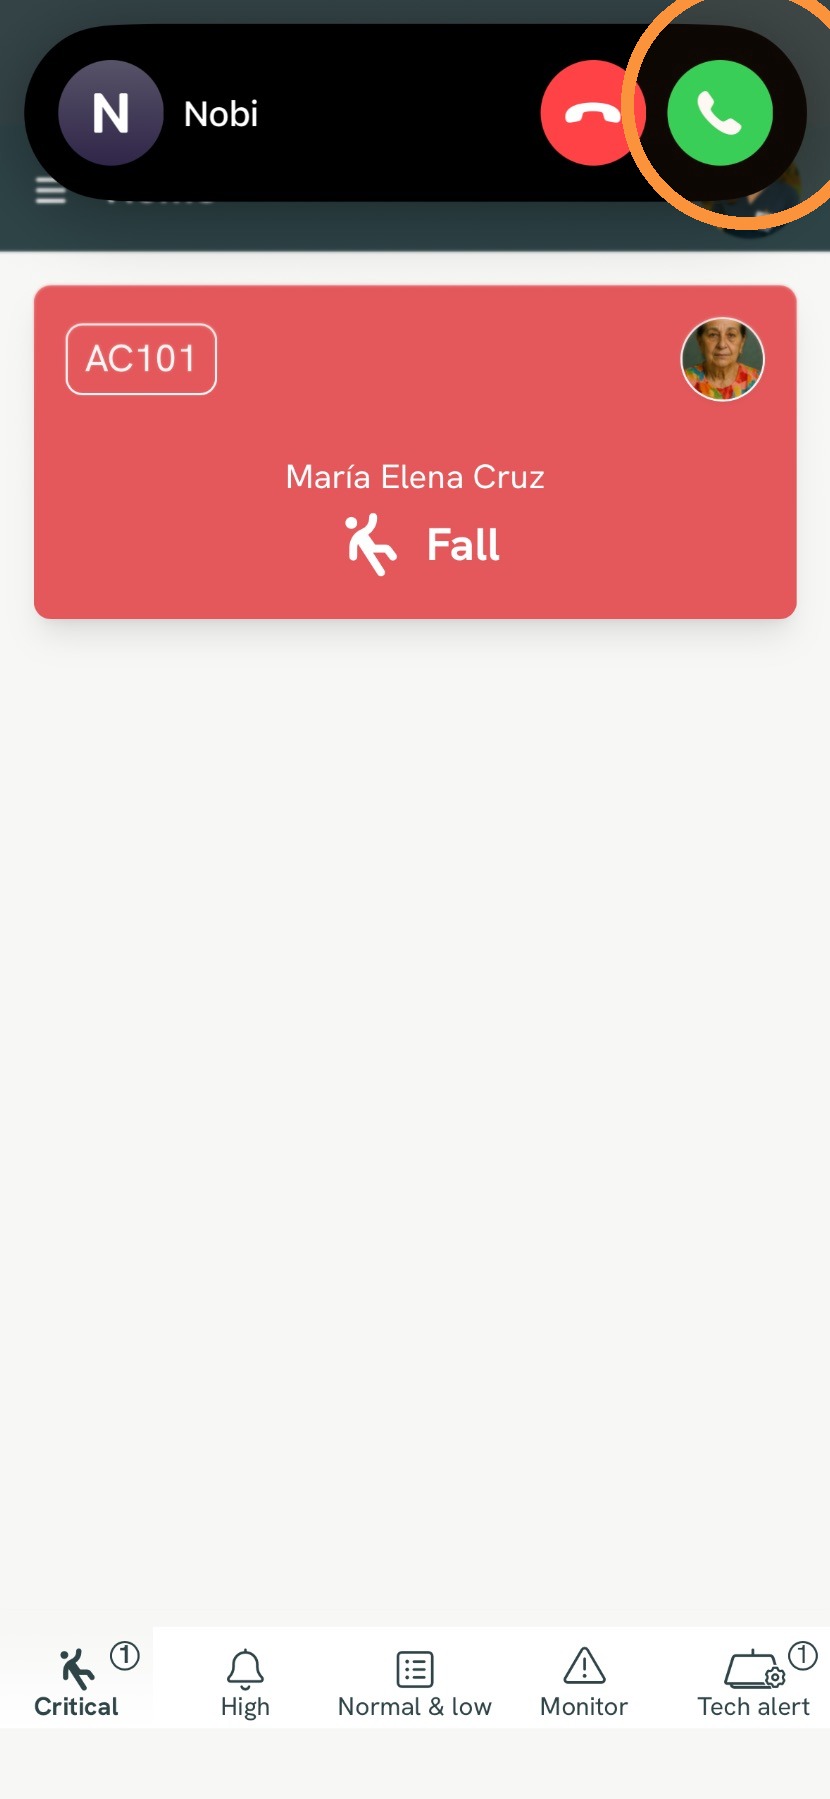
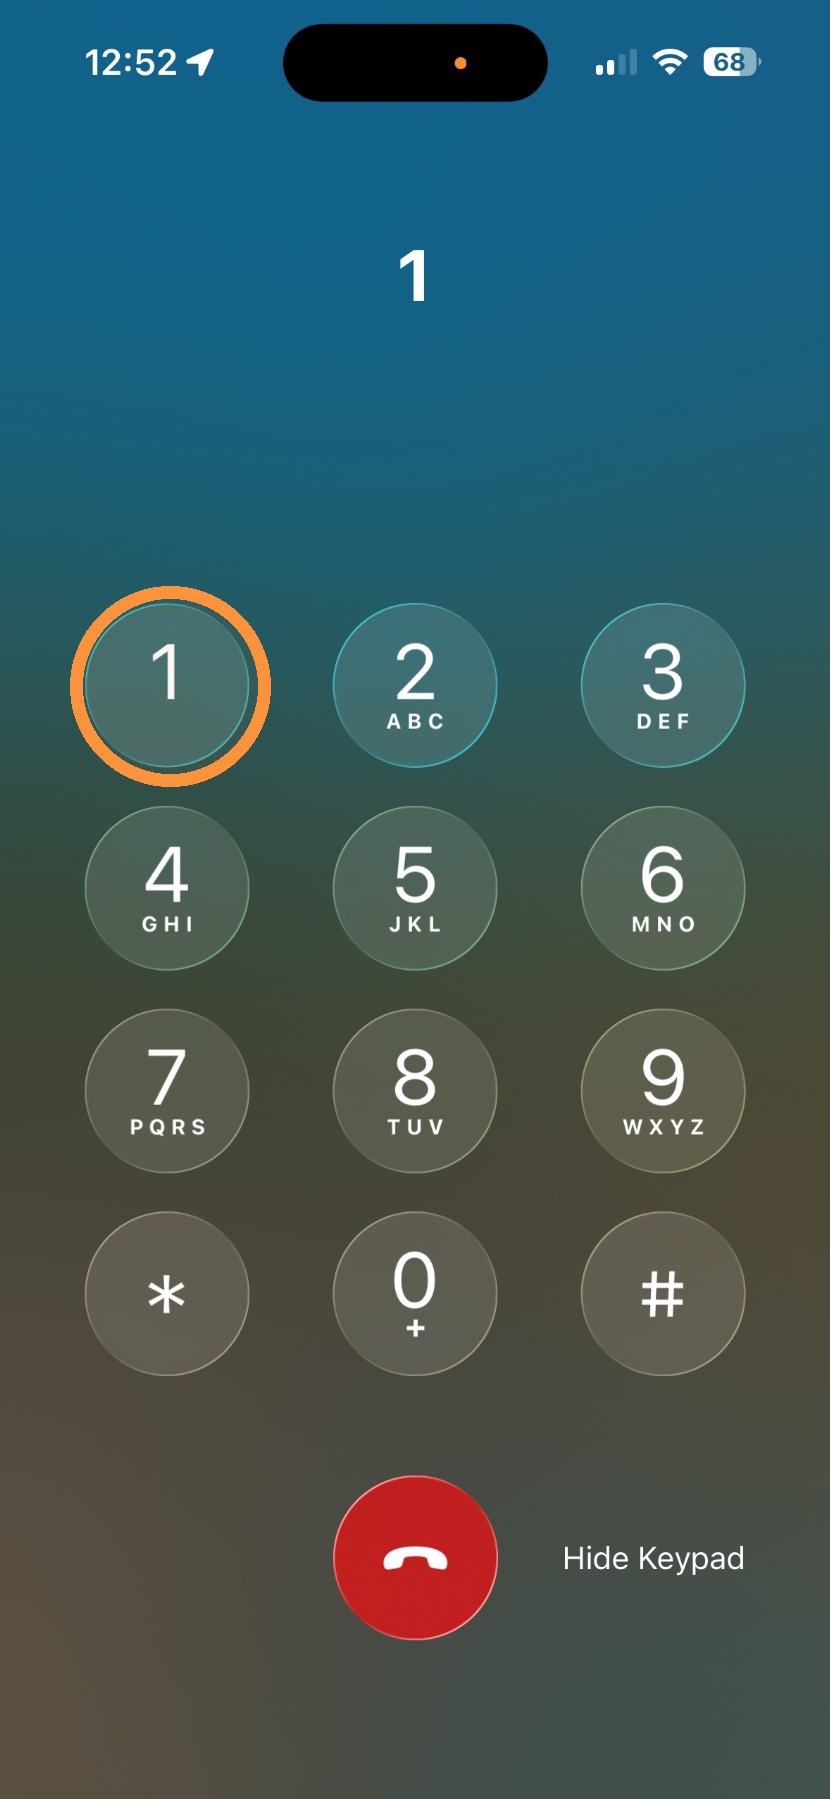
    Picking up the phone and pressing "1" will confirm the escalation. 

    For some escalations, (falls, housing unit call button calls, pull cord calls) two-way communication though the light is possible. If this is the case, pressing "1" will connect you to the resident. When communication is complete, simply end the phone call.

    If two-way communication is not possible, pressing "1" will automatically end the call.

    If after this the escalation is not closed after 10 minutes however, Nobi resumes calling. Note that Nobi will keep calling until you close the escalation.

    It is also worth noting that if Nobi detects two or more people in the room, it will pause further escalation calls. This prevents disturbing care staff who are already present and providing assistance. 

    Learn more about auto-pausing phone calls during an Escalation here


    When using the Escalations via Nobi Mobile App feature

    If the Escalations via Nobi Mobile App feature is enabled for a site / community or department, phone numbers will always be fall back. 

    This means that, if an escalation isn't claimed within a defined period of time, the phone numbers in the escalation procedure will be called. You can define the length of this period of time when enabling the Escalations via Nobi Mobile App feature. The calling of the phones follows the same method and procedure as described above.

    Having phone numbers in your escalation procedure, even when using the Escalations via Nobi Mobile App feature, ensures that no escalations go unnoticed. 


    Unsure of how to set up this escalation procedure? Take a look at set escalation procedure for guidance.

    Still have questions? Contact Nobi Support.

  • How to Move a Resident to Another Housing Unit

    Learn how to move residents from one housing unit to another.

    3 min task

    What

    With the Nobi application, residents are linked to housing units. When a resident relocates from one housing unit to another, you must move this resident to the new housing unit on the Nobi application.

    Why

    By moving the resident when they relocate to another unit, we keep all of the resident’s data as well as their privacy and housing unit settings. Therefore, there is no need to make a new profile in this other housing unit.


    Moving a resident

    Moving a resident to another housing unit is simple and can be done in the housing unit settings of the resident.

    Detailed Steps

    1. Go to Residents in the left menu.
    2. Navigate to the resident and click edit.
    3. Navigate to the Housing unit tab.
    4. Use the dropdown menu to select the housing unit. This will show you each department along with their housing units and how many people are currently living there. Click on the desired housing unit.
    5. Click on save.
    6. A green banner will confirm the changes.

    You have now successfully moved a resident from one housing unit to another.


  • How to Add a New Resident

    Learn how to add new residents to your site / community in the Nobi application using this guide.

    6 min task

    What

    For the light's smart monitoring features to work, you need to add a resident to the housing unit. When you add a resident and link them to a housing unit, you can choose specific privacy and housing unit settings unique to them. To add a resident, the resident must first give informed consent that their personal data be processed. Adding a resident is done via a wizard which will take you through the 3 steps you need to follow.

    Why

    All residents are different and unique. Therefore, you can set their individual settings depending on the resident’s preferences. By adding residents in Nobi, you can easily see a clear view of all the residents across the organisation.


    Adding a new resident 

    Let’s say we want to add resident ‘Alan Jefferson' to housing unit ‘Flat 101’. The wizard will walk us through the process.

    Detailed Steps

    1. Go to Residents in the left menu.
    2. Click on + add in the upper right hand corner. A window will popup which will take you through three steps
    3. Fill in the Personal data of the resident: 

      • First name
      • Last name
      • Call name - this is the name Nobi will speak when asking for fall confirmation if enabled. 
      • Date of birth
      • Sex
      • Language - the language the resident speaks. This determines the language the light speaks when asking for fall confirmation and delivering the morning greeting if enabled. 
      • Add an image of the resident by pressing Set image (it's possible to add a picture at a later time by accessing the resident's personal data via Residents in the left menu). 

      Please note, by checking the box below, you confirm that the resident has given informed consent to share and process their data. Checking the box will allow you to click on next.

    4. Fill in the chosen Privacy Settings for the resident. Here you can decide to activate or deactivate. Please note, Smart monitoring must be enabled for Live view and Escalations data to be selected:
    5. When you’re done, click next.
    6. Complete the Housing unit settings for the resident. The first dropdown allows you to link the right housing unit to the resident. Below, you can decide to activate or deactivate only if Smart monitoring was enabled via Privacy settings:

    Click done to add this new resident.

    You have now added a new resident and linked them to their housing unit.